Quantcast
Channel: Trailape's Wargame
Viewing all 81 articles
Browse latest View live

New Buildings from Battlefield Accessories?

$
0
0
Hi Guys
I was fortunate enough to be given a small building created by Mike Parker of BATTLEFIELD ACCESSORIES whilst visiting EUREKA MINIATURES a few days ago.
Mike produces some fantastic resin terrain but is now considering entering the world of 'Laser Cut' terrain.
Very early days but here is his initial offerings.
Two building, one in 15mm - 18mm scale and another in 25mm scale.
As you can see the kit comes flat packed. This is the 15mm version.
 Once opened it's always a good idea to lay all the parts out and then conduct a 'Dry Run' at assembly.
 Now here are some vids I took with 'step by step' assembly.
I'll admit they aren't of the highest quality. I used my iPhone and only have two hands,....


And here is a photo of the finished product with framing attached.

These are by my understanding just prototypes but the finished product should be pretty close to this mark.
I for one will be very keen to see these buildings hit the shelves and be available for purchase. As with all products from Battlefield Accessories these promise to be excellent value and a great addition to your terrain collection.
The prices I mentioned in the video IIRC are what was mentioned for the 28mm scale building.
I'll try and get a better idea of costs ffrom Mike or Nic.
Cheers

US Marines for Longstreet

$
0
0
 Hi All
Sorry for the long break between posts, but 'real life' stuff keeps getting in the way.
Anyway, continuing on with the 'LONGSTEET' theme I thought I thoughts I'd share my latest completed unit. An eight based US MARINES battalion.
I'm quite taken with the Battle of Bull Run (Manassas) and having served on several occasions with the US Marines I was very interested in producing the unit for my LONGSTREET collection.
The Marines sometimes look upon First Bull Run as a blemish on a particularly impressive war record but I'm of the opinion they have been judged harshly in regards to this particular engagement.
You can find an interesting article of the Marines performance at First Bull Run HERE
 As for this particular unit I used PERRY MINIATURES codes ACW 30 and 31 which are actually Confederates in Frock Coats but these were the closest I could get to what the US Marine Battalion would have been wearing at the battle.
The Flag ( a single National Colour) is from THE FLAG DUDE whom I can't recommend highly enough. These flags are outstanding and well worth the money.
ABOVE AND BELOW: My US MARINES using Perry Miniatures. Behind them you will notices another Federal unit. They are the 1st Maine Heavy Artillery deployed as infantry. I'll post more about them later.

I've based them 3 or 4 to a 40mm square base.
Here is an excerpt from the link I've provided covering the Marines efforts at First Bull Run.

"When several of the Federal units that had been driven from the hill finally regained composure, an attack was launched to recover the captured artillery. The 14th Brooklyn took the lead, followed, as Col Porter later said, "in fine style" by the Marine battalion. Other regiments fell in behind. Gaining the crest of the hill near the wreckage of Ricketts' battery, the rejuvenated Union troops took the Confederates under fire, driving them back across the plateau and into the pinewoods beyond.
The attack swept toward the position held by the Virginia brigade commanded by BGen Thomas J. Jackson. As the swell of the assault neared the thicket of pines, the 4th and 27th Virginia Infantry Regiments opened fire. An instant before the Virginians fired, the 14th dropped to the ground, and the Marines took the full effect of the volley. They wavered for a moment, but quickly recovered.

Pressing forward with the Brooklyn troops, now on their feet, the Marines plunged into the pines. Rebel fire intensified, and the attack began to falter. Reynolds was quickly in their midst, raining expletives on all within earshot. Lieutenant Colonel Edward W. Fowler of the 14th recalled Reynolds using "language more forcible than pious," but his efforts to hold the Marines went in vain. The entire line collapsed, and the broken remnants of the second assault force ran back across the plateau and down the hill to safety.
As the Confederates took up the pursuit, Daniel M. Conrad, surgeon of the 2d Virginia Infantry, surveyed the bloody aftermath of the fight. His account, published in the Southern Historical Society Papers in 1891, proved the determination of the Marines to break the Confederate line. "The green pines were filled with the 79th Highlanders and the red-- breeched Brooklyn Zouaves, but the only men that were killed and wounded twenty or thirty yards behind and in the rear of our lines were the United States Marines."

The Marines again rallied at the crossroads and, after reforming, charged back up Henry Hill in support of an assault led by the 69th New York Infantry. After making some headway, the Marines and the New York Irishmen were driven back by the counterattack of the 8th and 18th Virginia".
Please feel free to leave any comments.
Cheers
Scott

Longstreet Campaign Begins!

$
0
0
Hi
Finally I've got around to launching into a LONGSTREET Campaign.
My good friend Stan whom I've had many a MAURICE battle with (as you would have seen if you've followed the AARs on this blog) has agreed to be my opponent for the campaign.
I chose to be 'For The Union' and Stan obviously is the Confederate commander.
Before I begin an account of our first battle I'll list our ORBATS and some details on our respective 'Alter-Egos / Characters / Commanders.

Union Forces:
Rawlins's Brigade
Commanded By: Colonel Joseph Rawlin
11th New York Volunteers 'Fire Zouaves' 
14th Brooklyn 'Brooklyn Chasseurs' (Plus Two Companies from the 146th Zouaves)
Washington Marine Battalion (Plus Two Companies from the 74th Zouaves)
1st Michigan Volunteer Cavalry
5th United States Artillery 
All are EAGER RECRUITS with 10 BASES except for the Cavalry which have 8 BASES.
The ARTILLERY has 3 BASES; 2 Six Pounders and 1 Howitzer

Confederate Forces:
Detached 'North Carolina' Brigade from A.P.Hills Corp
Commanded By: ?
4th North Carolina
6th North Carolina
8th North Carolina
5th North Carolina Cavalry
Andrew's Maryland Battery.
All are EAGER RECRUITS with 10 BASES except for the Cavalry which have 8 BASES.
The ARTILLERY has 3 BASES; 2 Six Pounders and 1 Howitzer

July 20, 1861.
"The boys are holding up well. The march from Washington has been a good introduction to the rigors of war". Captain Puller commented to Major Richards, the commanding Officer of the U.S. Marine Battalion.
"Given how green they are they are doing better than I expected. None have fallen out and given all the dust we're chocking on its a small miracle. Being last in the line of march isn't what I expected either. Following in the wake of State amateurs! Who would have thought it"?
Ahead of the leathernecks trudged the Westerners of the 5th Michigan Volunteer Cavalry followed closely by the 11th New York 'Fire Zouaves' and the 5th Troop United States Artillery, the only other 'Regulars' in Rawlin's Brigade. 
Just in front of the Marines were the men of the 14th Brooklyn Infantry or the 'Red Legs' as they were being called.
The Brigade was under orders to cross the Tamera Run, a small easily fordable creek and seize and secure the Federal Armory at Harrysville before it fell into the Confederate's hands.
Unknown to them a Confederate Brigade of similar strength was heading directly for the same objective.

The Union Brigade was under command of Colonel Joseph Rawlin. Born in Virginia in 1816. The first born son into a family of  Cotton growers and slave owners he showed an interest in the Military and was accepted to VMI in 1835. He graduated 10th in his class and was appointed to be an Artillery Officer. He served in the Mexican American War where he gained a reputation as a very proficient gunner. He earned a brevet promotion to Captain at the Battle of Monterrey whilst serving in  Duncan's Battery. After the war with Mexico Joseph served in a number of posts as an Artillery officer.
In 1857 Joseph served under the command of Colonel Albert Sidney Johnston, commander of the US expedition that was sent to confront the Mormons.
At the conclusion of that expedition Joseph remained in the Utah Territory after meeting the strikingly beautiful Miss Raechel Harrywards, the daughter of a local blacksmith. They married and his new bride convinced Joseph to converted to Mormonism. Joseph soon became an influential member of the Salt Lake community and became a very successful sheep grazier.
In 1859 Joseph joined the Narvoo Legion with the rank of Captain.
When war between the states appeared inevitable Joseph returned east and was initially offered a commission within the Virginian Militia as an Artillery Major but his loyalty was to the Union. He traveled to New York and due to connections he had in the statehouse was given the rank of Colonel and command of a Brigade of predominately New York troops. His efforts in arranging the mustering of a future 'Mormon' Battalion of at least 1000 men went some way in helping to secure the military appointment, as did his very public stance on abolition and reputation as a successful officer and war hero.

Now the Union forces were closing in on their objective.
As the splashed across the clear cool creek known at Tamera Run a scout road up to Colonel (COL) Rawli with a report that rebel Cavalry and Infantry were ahead and were aware of the Federal troops presence.
"We will deploy our artillery on the road ahead! Between the small hill and that standing crop of corn. All units will deploy to the left of the battery except for the Marines! They will deploy in line to the right. I expect it will take the Rebs some time to get through those trees over yonder and when they do the young Leathernecks will hold them long enough. The Red Legs will move around to our left and drive the enemy's flank in. I want the Cavalry to cover their movement and then provide fire support when the attack goes in! The Fire Zouaves will cover the battery! Questions? MOVE OUT"!
  
ABOVE: Both My forces and Stan's troops 'Off Table' preparing to enter the fray.
BELOW: Details on my 'Character' COL Joseph Rawlin

The Battle commenced with my troops hurrying onto the Battlefield. The 5th US Artillery are deploying on the Harrysville Turnpike. Along side the battery is the 11th NYVI. The 1st Michigan Cavalry are moving off to the left screening the 14th Brooklyn. The US Marines are still to arrive.

The Federal Artillery was soon in action and had the privilege of firing the first shot of the battle, and accurate they were. The Confederate cavalry suffering early losses from the Yankee gunner's fire.
The Rebs deployed their artillery almost directly opposite the Union battery and concentrated primarily on counter-battery fire. The union gunners however were determined to reduce the threat from the enemies cavalry.
The bulk of the 'Tar Heels' Infantry started to move through the woods, apparently to either 'claim them' or maybe attack the union Right flank.  

The US Marines deployed in a line to cover Rawlin's Right flank. 
Meanwhile the Michigan horsemen dismounted after discovering some very heavy swampy ground . The 11th NYVI (Fire Zouaves) advanced to threaten the dismounted Rebel Cavalry but halted just short of the boggy ground. The Union gunners ploughed shot and shell into both the Rebel cavalry and the Reb infantry on the right of the Confederate Battery. They did a fair deal of damage to both units but the Gunners from Andrew's Maryland Battery finally got the Yankees range and two 6 Pounders were reduce to trash.

Undeterred by the swamp, the Michigan Cavalrymen, now with the 'Red Legs' up in support on their left advanced on the enemies Right flank.
Suddenly a scream emanated from the Tar Heels as the Rebel infantry cam screaming forward to engage both the 1st Michigan and the 14th Brooklyn. The Michigan Cavalrymen held firm by the men from Brooklyn were pushed back.
The Reb infantry recoiled, and between staggering volleys from the Michigan and Brooklyn troops continued to launch attacks with the bayonet.  


With the Confederate Cavalry and Infantry on the left now heavily engaged the gunners from the 5th US Artillery now fired on their tormentors in Andrew's Maryland Battery and repaid their accurate gunnery with the same and destroyed two of the rebel guns (1 Base). 
The Rebs attempted two more assaults with the bayonet, but one of the charges failed to get going.


 A final charge did go in, but it was repelled and the survivors were shot down to the man by merciless fire into their rear from the Michigan cavalry. At the same tome the last of the Rebel cavalry was shot down.


At this point the Confederate commander ordered a general withdrawal.
First blood to the Union forces.
Both sides finished the battle with three Epic Points. The Union gained one for the Victory. The Confederates gained on for the suicidal bravery of the Reb Infantry ant their repeated charges on superior numbers.
At the conclusion of the Battle my ORBAT now looks like this (Due to Battle Losses, camp sickness and fevers and Reinforcements.
Union Forces:
Rawlins's Brigade
Commanded By: Colonel Joseph Rawlin
11th New York Volunteers 'Fire Zouaves' 7 BASES Seasoned Recruits
14th Brooklyn 'Brooklyn Chasseurs' 6 BASES Seasoned Veterans
Washington Marine Battalion 8 BASES Eager Recruits
1st Michigan Volunteer Cavalry 5 BASES Eager Recuits
5th United States Artillery 2 BASES 1 Howitzer, 1 6 Pounder
REINFORCEMENTS:
Due to the debacle at Bull Run, Washington has decided to send Artillerymen from the 1st Main Heavy Artillery to serve as Infantry
1st Maine Heavy Artillery 10 BASES Eager Recruits
6th US Cavalry 6 BASES Eager Recruits

We have managed to gain some intelligence on the enemy (Broken Code card) so will have a slight advantage in scouting the next engagement and Washington has made Rawlin's Brigade a supply priority (4 Dummy Cards next battle).

I'll add further details on Stan's force once he has emailed it to me.
The next battle should take place very soon!
Feel free to leave a comment.

LONGSTREET CAMPAIGN. Battle No2 1862

$
0
0
 
Hi Guys
The post sees me posting a continuation of the LONGSTREET CAMPAIGN Stan and I started last week.
Want to know more of the previous engagment?  YOU CAN SEE DETAILS HERE!
 
It's now June 1862 and following the Union's victory at Tamera Run Colonel Rawlin's brigade has received their replacements and reinforcements and have pursued the Confederates into some fertile farmland.
Thanks to the addition of the US 6th Cavalry to the Union brigade and some good intelligence work Colonel (COL) Rawlin has been able to chose the tactical stance for this engagement.
"Given the enemy's superiority in artillery and willingness to use the bayonet I've decided to take the initiative men".
The gathered council of war gathered in closer to COL Rawlin's table.
"With the superiority in horse we have I'm confident we will be able to position ourselves in a way to get a localised advantage and break the Reb's line. The numerous standing crops should enable us to close with the enemy without suffering too much from their small arms fire. I want the new men from the 1st Maine and the Marines to be the main effort. I know they have been the butt of a few jibes from some other men for not seeing any action at the Run in the case of the Leathernecks and the fact the Maine men joined us after the battle. Today they'll be able to show the rest of the brigade what they can do. The Fire Zouaves and the Red Legs will cover our right. and support the main assault.
I want the cavalry to mass on the left. If you see a chance to take out an isolated enemy battalion feel free to do so but I expect that you will ensure the left flank of the main effort goes in un-molested. The Battery will provide as much fire support for the attack as possible. Keep it hot and keep it pouring in. I need our boys supported as much as possible. They are Green, but the Rebs are pretty green also. I will not wish you luck men as I don't believe in luck. If God will's it we will be triumphant".


POST BATTLE SUMMARY:
I probably should have fought this battle more defensively however the Confederate superiority in Artillery (3 bases to my two) and the fact he had a Rifle in the mix suggested he might be able to sit back and simply pepper me with is guns. I also wanted to close with the Rebs rather than have them close with me as the 'Rebel Yell' can be devastating to deal with.
I was pleased with my efforts on my right flank. The 11th New York really gave the Rebs hell, but I just couldn't catch a break elsewhere. At least a 'HERO' emerged in the ranks of the Marines so it will be fun painting a 'character' figure for the Brave Marine Junior Officer!
In short, this was my battle of Antietam.
From the Confederate perspective I'll let Stan explain:
 
The confederate plan was to wait behind the corn fields and fire on the union troops as they charged. All the while I just planed to hold on the left and right. This worked, but I was getting worried about the artillery losses and the 8th NC being shot up so charged in the middle and keep pushing until the Union forces reached break point.
 
Both my Commander (COL Rawlin) and Stan's commander COL Fransworth III were successful in gaining promotion. Now we both have Brigadier Generals leading our forces.
 
The UNION ORBAT now looks like this:
 
11th NY Fire Zouaves: seasoned Veterans 6 bases

14th Brooklyn: seasoned Recruits 4 bases

1st Marines: eager recruits 6 bases HERO!

1st Michigan Volunteer Cavalry: eager recruits 2 bases

5th US Artillery Company. 2 bases (1 6pdr gun & 1 Howitzer)

1st Maine Hvy Arty: eager recruits 7 bases

6th US Cavalry: eager recruits 5 bases

Reinforcements
? Infantry: eager recruits 10 bases
? Infantry: eager recruits 6 base
? Artillery Company. 2 bases (2 x Howitzer)
(note) ? = still to be named.
Total EPs 6
3+3+
Promoted to 2 Eagles (Brigadier General).
My man has 6 'EPIC' points  and Stan's chap has 7.
This Battle is also the first one where I posted the AAR using a COMIC BOOK style. I'd be very interested to hear your thoughts. Does it work? Does it look good? Is it better presented than my previous AARs?
Comments on this and anything else you might want to share welcomed.
ALL ARTWORK is by Don Troiani.
Cheers


Damp Wood! Longstreet Campaign Battle No 3.

$
0
0

The dawn broke over the small stream that ran along the front of the tree line before rolling into the leafy forest.
Men in blue coats quickly finished filling canteens and returned to their 'Colours' as drums beat a call to arms.
The Union troops finished badly cooked breakfasts and packed away tents.
After their defeat at 'The Cornfield' in June the Union Brigade had withdrawn north back to join Pope's Army of Virginia. They had not been present at the debacle at 2nd Manassas and had now become part of the Army of The Potomac.
The Brigade was now operating again as an independent Brigade tasked with defending the logistic centre near Boonsboro
Now as the Union army under command of 'Little Mac' went into action at Antietam Rawlin's Brigade was preparing to defend the town supplies concentrated nearby from a rouge Confederate Brigade that was approaching from the north west. Were they intending on raiding the supply depot or were they simply hurrying to the sound of the guns blazing away near Sharpsburg?
It really didn't matter why the Confederates were there, only that they were there and looking for a fight.


 Across from the federal position the confederate brigade prepared for battle. Their artillery was positioned so as to provide fire support to the massed Reb infantry. It was apparent to the union commander, Brigadier Rawlin, that about 3000 rebel infantry intended to advance on the center of the union line via the woods and broken ground in the center of the field of battle. The rebel cavalry appeared to be tasked with protecting the rebel artillery just in case the Yankees decided to go on the offensive, or maybe exploite some opportunity if it presented itself.
"We will keep the Marines in reserve" Brig Gen Rawlin gestured to an aide and his horse was brought to him. "I expect the Rebs wil fall on our center. The 1st Maine and the 11th New York will meet them. I will use both batteries to fire into the flanks of their assaulting columns as the come on as I know the will. The 14th Brooklyn will counterattack the left of the enemy attack and the new boys from Utah will strike the right. The cavalry will hold our right flank. Hopefully the 1st Minassota will arrive soon, but we need to be ready to fight this day without them. Those people over yonder mean to drive us off. They're arrogant people. Today we must stand firm"!
Rawlin settled into his saddle. "I'm confident we will prevail men, with or without Minassota".

 BELOW: The Rebel Deployment.


ABOVE AND BELOW: As the Confederates emerge from the small wood they are confronted with an unexpected swamp.
The 11th New York Volunteer Infantry 'Fire Zouaves' lead the charge against the Rebs! The 1st Maine supported them on their right flank!


 During this heavy fight Sergeant (SGT) Clements of the 1st Main (Heavy Artillery) sigle handly slew 4 rebs who attempted the carry away the Regimental Colours of his regiment. Grasping the large yellow flag he yanked it from the grasp of a rebel Corporal and swinging his rifle like a handspike clubbed the Grey uniformed man down. As three more rebs came up to claim the flag SGT Clements picked up a fallen officers sword and ran the first man threw before drawing his revolver and shooting the other two.


It was an tough battle for the Rebs. Even with my largest battion off the table, (the 10 based 1st Minnesota) it was always going to be hard for the Confederates to succeed in driving the yanks away.
After the battle both Brigades reordered themselves and recieved reinforcments and rplacements. As usual sicknes in the camps took as many lives as battle itself.
Brigadier General Rawlin formed a provisional Regiment out of the remains of the US Marines and the 14th Brooklyn with the three remaining companies forming a small 6 company Battalion.
The Utah Volunteers fought like demons, and were upgraded to 'Veteran' status.
News of the arrival of a small Regiment from New York and a 4 gun (2 base) Light Rifle Battery was very welcomed news.
As 1862 slipped into 1863, 'Rawlin's Brigade' now looked like this:
 
INFANTRY REGIMENTS

11th NY Fire Zouaves: Seasoned Veterans 6 bases

The Provisional 14th Brooklyn & 1st Marines: Eager Veterans 6 bases HERO!

1st Maine Heavy Arty: Eager Veterans 5 bases HERO!

The Utah Volunteers: Eager Veterans 6 base

1st Minnesota: Eager Recruits 10 bases

CAVALRY REGIMENTS:
6th US Cavalry: Eager Recruits 3 bases

ARTILLERY TROOPS
5th US Artillery Company. 2 bases (1 6pdr gun & 1 Howitzer)

9th US Artillery Company. 2 bases (2 x Howitzer)

Reinforcements:
44th New York Infantry: Eager Recruits 6 bases.

2nd US Artillery Company. 2 bases (Light Rifles)

As for EPIC POINTS, Brig Rawlin's total was 9. (three from each battle) and he had achieved one Promotion (after the 2nd battle).
Despite his success at this engagment no promotion was forthcoming.

Total EPs 9.
3+3+3+
Promoted to 2 Eagles (Brigadier General)
Stan and I also decided on a new HOUSE RULE:
BAD SURVEYING:Cannot used in the enemy deployment zone and can not be place in an area between a enemy and TARGETED friendly unit once that those units are within 16cm of each other.

FoG Napoleonic at LoA

$
0
0
ABOVE: French Light infantry attempt to cross a stream in the face of Russian Jagers.
Hi Team
About a week ago I got together with my good mate Arnaud for a game of Field Of Glory, Napoleonic (FoG:N) at The League of Ancients (LoA) in Melbourne.
We were both keen to blow the cobwebs away and have a crack at these excellent rules that fall neatly into that gap between Battalion and Grand Tactical level rules where you manoeuvre 'Regiments' or Brigades within the scope of a Corps Commander.
It had been over a year since either of us had played and with a FoG:N tournament being hosted by the LoA in July we both wanted to get back into the swing of things.
We made a few mistakes with the rules but hey, that's why were wanted to play a test game.
We had both also forgotten what a cracking good game FoG:N is.
 Arnaud and I decided to play a 800 point per side battle. I opted for a Russian Advance Guard Corps of 1806 while Arnaud ran a French Infantry Corps of 1805.
I won't give a blow by blow AAR but suffice to say we both made plenty of mistakes with the rules. Fortunately there were plenty of LoA players who were more 'current' with the rules and helped out as needed.
As for the actual battle,... Arnaud planed to demonstrate in the centre and attack on the flanks. As we all know however what you demonstrate with needs to be sufficient to be of concern to the enemy.
As the French attacks on my flanks developed (actually the only real concern was on one flank, my right) I launched an assault of my own at the French centre.

ABOVE and BELOW: The Russian Right (above) with the Cavalry Reserve of Dragoons and Cuirassiers and Horse Artillery and Centre (below)
BELOW: The Russian left flank. Conscripts in 'Square Formation' with a Battery and Cossacks in support

BELOW: Fighting erupts on the Russian Right Flank
BELOW: French pressure builds on the Russian left.
BELOW: The Russian attack in the centre goes in! Grenadiers supported by Russian Light cavalry and Artillery. Flanked by Russian Jagers on the left and a Division of Infantry and the Cavalry reserve on the right. The French are spread to thin,...
BELOW:French light infantry and Russian Jagers face off across the stream. These two brigades face off each other the entire battle.
BELOW: The French Light Cavalry division. Spectators for the entire battle. I suspect Arnaud wished he'd used them in the centre.
BELOW: The Russian assault closes with the thin French 'Assault' in the centre.


BELOW: After the Russian success in the centre the Russian Reserve cavalry attacks on the right, smashing through the French brigade between the orchard and village.
BELOW: The French failed to form 'Square' with predictable results.
BELOW: End Game!
Conclusion:
Arnaud and I had forgotten what a great game FoG:N gives you.
Like I said, we made some mistakes with the rules but we cant wait to play again.
The LoA will be hosting a FoG:N Tournament in July and I'm keen to give my Dutch Belgian Reserve Corps of 1815 a run. A sea of crud but a pretty army.
Until then, keep your powder dry.
As usual, comments are welcomed.
Cheers

Longstreet Campaign battle number 4

$
0
0
Hi Guys
Stan and I played the fourth game in our LONGSTREET campaign.
The date is now 2 March 1863 and the Union forces have had the better of the fighting winning the initial battle in 1861, losing early in '62 but bouncing back to a victory in late '62.
What follows is the After Action Report for game number 4.
Rawlins' Brigade was moving moving again in Confederate territory.
The Virginian countryside was yielding good supplies for the foraging parties. The new regiment (the 44th NY) had arrived as had the Rifle armed US 2nd Artillery. The 1st Minnesota had joined the Brigade back in late 1862 but hadn't fought at Damp Wood. Their Colonel had requested they lead the next attack the Brigade might be called on to execute. Little did he realise that Brigadier Rawlin had already identified the Regiment to be his main effort for the up coming battle.
The Brigade was tasked to secure the crossroads at the small town of Broadfordsburg.
As the scouts arrived back at Brigadier Rawlin's HQ is was apparent that they would have to attack the Confederates who were deployed behind a walled farm.


After the battle the Union Brigade now looks like this:

INFANTRY REGIMENTS

11th NY Fire Zouaves: Seasoned Veterans 6 bases

The Provisional 14th Brooklyn & 1st Marines: Eager Veterans 6 bases HERO!

1st Maine Heavy Arty: Eager Veterans 6 bases HERO!

The Utah Volunteers: Eager Veterans 6 base

44th New York: Seasoned Recruits 6 bases 
28th Massachusetts infantry: Seasoned Recruits 10 bases


ARTILLERY TROOPS
5th US Artillery Company. 2 bases (1 6pdr gun & 1 Howitzer)
9th US Artillery Company. 2 bases (2 x Howitzer)
2nd US Artillery Company. 2 bases (Light Rifles)

Reinforcements:
44th New York Infantry: Seasoned Recruits 6 bases.

28th Massachusetts infantry: Seasoned Recruits 10 bases
6th Massachusetts Artillery Company:  2 bases (Light Rifles)

As for EPIC POINTS, Brig Rawlin's total is now 11 (3 from each previous battle and 2 for Broadfordsburg) and he had achieved one Promotion (after the 2nd battle).

There was some additional good news for the Brigadier. His Beautiful young wife had recently inherited a small fortune from an old uncle in New York. He was now WEALTHY (a extra biography card that would help in securing Promotion). She arrived at his HQ to deliver the news in person.

Furthermore the Brigade would have PRIORITY supplies for the next engagement and again the Federals had obtained some valued intelligence on the Reb's movements (a BROKEN CODE card).

Total EPs 11.
3+3+3+2+
Promoted to 2 Eagles (Brigadier General) 
Stan and I also decided on a new HOUSE RULE:

BAD SURVEYING: Can not used in the enemy deployment zone and can not be place in an area between a enemy and TARGETED friendly unit once that those units are within 16cm of each other.

AB Miniatures: Netherlands High Command and Light Dragoons

$
0
0
 Hi Guys
I had a great time at LITTLEWARS in Melbourne last weekend.
Whilst there I picked up from Nic at EUREKA MINIATURES the latest additions to my Dutch Belgian 1815 collection.
Here we have the ADC set consisting of an ADC and Guide. Both a beautiful miniatures with the ADC handing over a message
 But for me the 'One Piece' casting of William, Prince of Orange is just magnificent.
He's accompanied by Baron Jean Victor de Constant Rebecque, a two piece casting of rider and horse.

 As you can see from these photos the detail and posing is simply brilliant.
I intend to base Prince William and Baron Jean Victor de Constant Rebecque with the ADC and Guide and a couple of British Officers including an ADC from the British 9th Light Dragoons.
I also collected some Dutch Light Dragoons. Again these are up to the usual superior standard that one can take for granted when purchasing AB Miniatures. There are both 'Charging' and 'Resting' poses. I have one 12 figure unit of each. Pictured below are just some of the charging poses.

I'll get around to posting photos of the finished painted and based collection soon I hope.
Cheers

Quatre Bras Refight with FoG:N

$
0
0
ABOVE: The Battlefield at the commencement of the game.
This weekend myself and two friends decided to play a refight of Quatre Bras. With a FoG:N tournament approaching we decided that these rules would be an excellent set to use to fight the battle.
Arnaud (as usual) commanded the French Corps and would be Marshal Ney. Tyler would play the part of William, Prince of Orange and Wellington (on his arrived on the Battlefield).
The Orders of Battles I obtained from HERE.
To make the battle less predictable and more interesting I set up all of Ney's forces on the field with the exception of Jerome's Division arriving on the 2nd turn. The French heavy cavalry would arrive only on a roll of 4,5 or 6 on turn 3, on a roll of 3,4,5 or 6 on turn 4, and 2,3,4,5 or 6 any turn there after.
The Allies would start with only Perponcher two divisions on the field with all the other divisions of I Corps arriving over the next turns one division at a time
Viscount Hill's Corp, (II Corp) would arrive the next turn after the last of I Corps divisions with each division arriving as follows after rolling anything other than a 1 or a 2:
On a roll of 1 or 2 The Corps Cavalry
On a roll of 3 or 4: Sir Thomas Picton's Division
On a roll of 5 or 6: The Brunswick Infantry.
Simply put when the last of the 1st Corps arrived we roll a D6. As long as a 1 or 2 wasn't rolled the Corps commander would arrive with Wellington (Exceptional 'Charismatic') who would replace the Prince of Orange (Competent 'Charismatic').
Now another D6 was rolled. If a 1 or 2 was rolled then the following divisions from 2nd Corps would not arrived, assumed to be caught up in the traffic jam on the road leading to Quatre Bras. If a 3,4,5 or a 6 was rolled then another D6 was rolled to see WHICH division arrived.
Simple!
 ABOVE: The initial Allied deployment.
BELOW: The buildings of Quatre Bras.
 The battle opened with the two French infantry divisions advancing cautiously towards the Dutch Belgian lines. The French cavalry (a small brigade of lancers and a large brigade of Chasseurs) and their artillery support made a wide sweeping flanking move on the allies left flank.
Fortunately for the Allies just at that time the British Guards brigade arrived and quickly moved off the road to cover the allies' left flank.
This flanking movement from the French soon fizzled out to nothing. The French effort now switched to the Dutch Belgian brigades in the center to the west of the Charleroi - Brussels road.
BELOW: The French Lancers and Chasseurs a Cheval that attempted to envelope the Allies' left flank.

 BELOW: The French 5th Division
 BELOW: The French 9th Division commanded by Foy.
 As Prince Jerome's Division moved towards the French right flank in support of the now stalled cavalry movement another British division (LtGen Alten's 3rd Div) arrived consisting of the 5th Brigade of English battalions (the 33rd, 30th, 69th and 73rd Foot) and the Hanoverian Brigade consisting mainly of conscripts. The 5th Brigade moved off to support the English Guards on the allies left whilst the Hanoverians moved to support the Netherlanders and their German kin in the Nassau Brigades in reserve.
 ABOVE: The French 9th Division of Foy, Bachelu's 5th Division and in the distance the French 2nd cavalry Division of Comte Pire.
BELOW: French 2nd cavalry Division of Comte Pire. sweeping towards the allies left flank.
BELOW: The British Guards foil the French Cavalry sweep.

 ABOVE: Sporadic artillery fire in the center.
BELOW: The British Guards. Two Brigades block the French Cavalry.

 BELOW: The Hanoverian Brigade moves down the road. The British 5th Brigade moves up on the left of The Guards.

 ABOVE and BELOW: Action on the Allies' left flank.
 Impatient for a breakthrough and not willing to await the arrival of the Heavy Cavalry division that was a due to arrive Ney hurled the Guard Light Cavalry at the Netherlands Brigades and some Dutch artillery.
The Dutch Militia Brigade were in tactical formation and scrambled to form squares and the Dutch gunners ran to the British Guards for cover. 2000 Guard Chasseurs a Cheval, Mamalukes and Lancers descended upon the Dutch infantry. Their disordered squares were torn apart by the Guards just as the French heavies under General Kellerman arrived to support the developing attack in the centre. 

BELOW: The French Guard Light Cavalry move towards the center.

ABOVE: Foy's Division spars with the Belgian infantry
BELOW: The French Guard Light Cavalry commence their charge.
 After slaughtering the Dutch militia the Guard Lancers charged on again and crashed into the large Nassau Brigade (the 2nd Nassau Infantry Regiment) that was in reserve. Yet again the Prince of Orange's men could only form disordered squares and they too were swept away.
As the the French Guard cavalry was slaughtering the Dutch militia a Nassau Brigade (the 28th Orange-Nassau Regiment) was busy driving off Husson's 1st Brigade from Bachelu's 5th Division who had been caught withdrawing after a failed assault on the British artillery.
 The Allied cavalry division arrived as the French Guard cavalry had started their advance and moved off to the east in an effort to envelope the French cavalry that had now stalled in front of the British Guards.

BELOW: The all conquering Guard Lancers destroy all in their path.
 The situation was now as follows:
The French cavalry envelopment of the Allies left flank had stalled thanks to the British Guards and was now itself in danger of being enveloped by Dutch Belgian and Brunswick Cavalry.
The French Guard Light Cavalry Division had smashed both a Dutch and a Nassau brigade and was pouring into the centre whilst a Nassau Brigade had counter-attacked on the East side of the Charleroi - Brussels road and driven off a brigade of French infantry.
On the allies right flank very little had happened at all apart from the batteries exchanging some round shot.
Wellington now arrived on the battlefield to take over from The Prince of Orange. The large Hanovarian brigade was place in the center.
The Nassau brigade that had driven off the French 1st Brigade was now itself taken in the flank by counter-attacking French infantry and destroyed.

 The French Guard Chasseurs a Cheval now wheeled right and overran a battery whilst the Guard Lancers wheeled left and took the Belgian brigade in the flank and destroyed them on the edged of Bossu Wood. Only the 27th Jagers remained of the 2nd Netherlands Division!
BELOW: The Belgian Infantry Brigade is taken in flank by the Guard Lancers.
 Now the French Heavies came into action. The Cuirassiers and Dragoons charged through the gaping hole made by the Guard Light Cavalry and came charging onto the Hanovarian militia in the center.
An all to familiar pattern emerged. The Hanoverian militia failed to form solid squares and were run down by the French heavy cavalry. The British had deployed the 5th Brigade behind the Hanovarians but they suffered the same fate as the Dragoons followed through onto them. As had happened in the real Battle of Quatre Bras the British 5th Brigade had been cut to shreds by French Heavies,...


 ABOVE and BELOW: The Hanoverians meet their fate.

All the while the remaining divisions of the allies 2nd Corps had failed to arrive.
At this point Wellington conceded defeat and ordered the remains of 1st Corps to retreat towards Brussels.
It was a excellent game. The failed arrival of the Allies 2nd Corps sealed the fate or Orange\Wellington though if any of the Germans or Dutch had formed solid squares they might have held on long enough for the 2nd Corps to arrive and save the day.
It just wasn't meant to be.
Oh well,....

 ABOVE and BELOW: The destruction of the British 5th Brigade.


As usual, feel free to leave comments.
Cheers

UPDATE:
Eric asked a question that deserves a fuller explanation:
"Why do you refer to the units as Brigades when FoG:N says the units represent 'Regiments'"?

Hi Eric
I refer to the units as Brigades because that is what they are. The authors of FoG:N (for reasons I'll never understand) say the units represent Regiments. The truth is rarely did entire Regiments take to the field. Normally it was Battalions FROM regiments that would come together to form Brigades (a collection of Battalions). Let's look at a FoG:N unit in this battle. The Allied (Brit) 5th Brigade for example. 
To make a small unit in FoG:N (1200 to 2000 men) then we have 1 battalion from each of the 30th, 33rd, 69th and 73rd Foot each providing an average of about 500 men. NOT a Regiment at all. Actually 4 battalions from 4 different regiments. Now look at the French 1st Brigade from the 5th Division. 4 battalions from the 2nd Light Inf Regt and 2 battalions from the 61st Line for a total of just over 3000 men (a LARGE unit). Again, 2 different Regiments. To try and create two 'Regiments' would result in a SMALL 2nd Light Infantry but not enough (only 800 men) to make a SMALL 61st Line Regiment. So I settled on a LARGE Light Infantry unit with a SKIRMISH element due to the preponderance of Light Infantry from the 2nd Light Infantry.  
By contrast the 2nd Brigade of the  2nd Netherlands Brigade consists of 1 LARGE unit made up of 3 battalions from the 2nd Nassau Line regiment with a total of 2600 men! 
Oh and all the miniatures are either AB Miniatures and a handful of Fantassin / warmodeller figs.
I'd use FoG:N if you are trying to fight the whole battle or Lasalle if you want to fight just a part, like the fighting around Bossu Wood.

GETTYSBOROUGH! Longstreet Campaign Battle No 5

$
0
0
Hi Guys
Stan and I are up to game 5 of our Longstreet Campaign.
It's now June 1863 (the second of three played in 1863).
So far honours have been shared with two victories each.
Read On:


So another victory to the Union forces.
The bonus for me in this engagement was picking up 5 EPIC POINTS!!
Also, my man was promoted after this battle.
The Union Brigade now looks like this:

11 NY Fire Zouaves: Cautious Veterans 5 Bases
1st Maine Heavy Artillery: Eager Veterans 6 Bases with a HERO
The Utah Volunteers: Eager Veterans 6 Bases "OLD RELIABLES"
28th Massachusetts 'Irish': Seasoned Recruits 5 Bases with a HERO
44th New York Infantry: Seasoned Recruits 8 Bases.
5th New York Zouaves: Seasoned Recruits 10 Bases (Reinforcements)

5th US Artillery: 1 6Pdr smoothbore and 1 Howitzer
1st US Artillery: 2 Howitzers
6th Massachusetts Artillery 3 x Light Rifles

Major General Rawlins 16 EPs
3+3+3+2+5
Promoted to 3 EAGLES

Bloody Run. AAR number 6 in our LONGSTREET campaign

$
0
0
 
Hi Everyone
This is the 6th AAR in my LONGSTREET Campaign.
Stan and I fought this engagement over 3 weeks ago but due to some technical issues, (my laptop died) I've only now managed to upload the AAR.
We're now into the last battle of the year 1863.
The LONGSTREET campaign system sees 1 battle in 1863, 2 in '62, 3 in '63, 2 in '64 and one final battle in 1865.
The card decks favours the Rebs in 1861 and 1862. By 1863 the decks are evening out and the Yanks get the advantage from '64 onwards.
Obviously as the commander of the Federals I was keen to be moving into 1864.
So now we find ourselves facing the Confederates across a icy stream called 'Bloody Run' due to the rich red mud and soil of its banks.
It would soon be known as 'Bloody' Run for another reason,...


NOTE:Stan played the 'CONFUSSION' card and the men from Maine went retreating back across the run,...


After the battle the Union troops settled down on the southern bank and licked it's wounds as the Confederates withdrew south.
President Lincoln visited the Brigade two days after the battle and moved amongst the men with words of encouragement and thanks for their efforts.
In particular he praised the men from Maine, many of the officers of whom he had met before when the manned the heavy artillery around Washington D.C.
The Brigade also received reinforcements in the form of the 5th New York Volunteer Infantry.  
The Brigade now looked like this:

11th NY Fire Zouaves: Cautious Veterans (5 Bases)
1st Maine Heavy Artillery Regiment: Eager Veterans (6 Bases) HERO
The Utah Volunteers: Eager Veterans (6 Bases) 'OLD RELIABLES'
28th Massachusetts 'Irish': Seasoned Veterans (5 Bases) HERO
44th New York: Cautious Recruits (5 Bases)
146th New York: Seasoned Recruits (7 Bases)
5th New York Volunteer Infantry: Seasoned Veterans (6 Bases)

1st US Artillery: 2 x Howitzers
2nd US Artillery: 2 Light Rifles
5th US Artillery: 1 x 6 Pdr and 1 Howitzer
6th Massachusetts Artillery: 3 Light Rifles 
  
Major General Rawlins has 19 EPIC POINTS!

A Tale of Two Farms

$
0
0
A Tale of Two (or is it three) farms

If there is one area of tabletop war gaming that is usually and painfully underdone it the area of nice, quality terrain.
How often have we seen nicely painted miniatures manoeuvring across a table top covered in terrain that quite frankly is an eyesore?
For most of us building nice terrain is a real challenge.
It's one thing to paint a beautifully sculpted miniature but it's another to creat a realistic model of contemporary buildings.
As a child I loved the old Airfix buildings. Remember the Roman Fort and US Cavalry fort? The D-Day gun emplacement sets, the Jungle HQ, the Arabian / French Foreign Legion Fort and of course the Pontoon Bridge set were 'must have' items. 
Alas they are not available in either 15mm or 28mm.
So it was a case of either scratch building or buying 'ready made' resin models.
And then came the MDF kits!
There has been a lot of buzz about these kits, particularly the very nice 4Ground kits.
They are however rather pricey.
Today I'm going to explore two or three recent kits that have become available. Kits that allow we budding architects to build that most desired of buildings, La Haye Sainte of Waterloo fame!
You've all probably heard of Warlord Games La Haye Sainte (LHS) box sets. There are two. The 'Battle Set'
http://us-store.warlordgames.com/collections/napoleonic-wars-1789-1816/products/la-haye-sainte-battle-set


and the 'Collectors Set'
http://us-store.warlordgames.com/collections/napoleonic-wars-1789-1816/products/farmhouse-assault-la-haye-sainte-collectors-edition

There is however another set.
Battlefield Accessories (Mike Parker) has produced his own version. This is available through Eureka Miniatures.
The Battlefield Accessories (BA) version of LHS was released almost on the same day as the Warlord Games (WLG) version so I suspect not many people will be aware of its existence.

There is a third manufacturer.
4Ground has made a version of LHS, but unfortunately I want be reviewing that kit, just the Warlord Games and BA versions.
Given the 4Ground version is selling for a not inconsiderable £275 (about $500 something) I can just continue to dream.
No, I'll be looking at the 'less expensive' versions.
I'll do the review over a couple of posts.
First I'll share my thoughts on the pros and cons of the two sets I'm reviewing, (the WLG 'Battle Set' and the BA LHS set).
Once discussing the content and first impressions are dealt with ill discussing building the kits, which was easier to do, and which is more detailed and practical for gaming with.

Ok. First impressions?
The WLG battle set come in a rather nice box with artwork depicting the famous farm house on that fateful June day in 1815.
Opening up the box we find all the contents listed
La Haye Sainte contains:

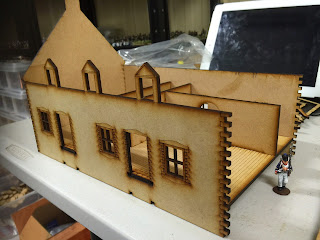
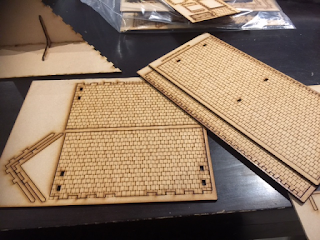
Laser-cut wooden farmhouse, out-buildings, walls and pond including construction guides and acetate windows
Laser-cut wooden tables and chairs – use as firing steps
Two laser-cut wooden carts and plough (barricade)
Six metal branches to form an abatis
Major Von Baring, King’s German Legion 2nd Light Battalion (exclusive metal figure)
15 metal King’s German Legion 2nd Light Battalion with rifles and muskets
5 King’s German Legion light infantry
36 French Light Infantry (30 plastic and 6 metal) including full-colour flag sheet and waterslide decals
Lieutenant Vieux (exclusive metal figure) and five metal French Engineers with muskets or tools
12-page scenario booklet

The first thing I noticed was the very professional packaging.
There is a interesting 'Scenario' booklet aimed at the gamer using the Black Powder rules.
As you can see you receive 62 miniatures, about half are plastics. Let's say you get $160 of miniatures to go with the farmhouse. So for $385 AUD you can say that that the farmhouse costs you $225 give or take.
This observation is important to consider.

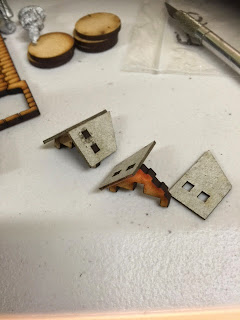
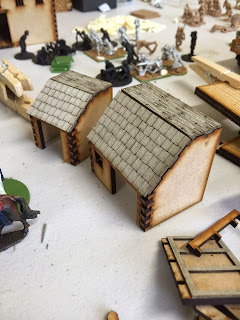
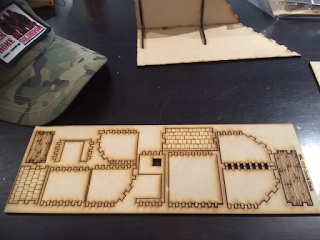
By contrast you will notice the BA version of LHS comes in a plain white box. Within you you will find the lazier cut 'bits and pieces' necessary to construct the farmhouse of LHS.
There are also photo copy standard pictures of all the various buildings and walls that are required to be assembled to build the farmhouse complex.
There are no miniatures to speak of. There are also assembly instructions / construction guide as such, just the photocopy pictures.
However I've found the photocopy pictures are all I really needed. That said Mike has posted a very very handy uTube video that shows you how to construct a building and Mike promises that more instructional videos will follow shortly.
You can see the first video here:
http://youtu.be/Wk3q0k8q1UY

What's really cool about the video guide is not only are you shown how to construct one of the buildings from the BA LHS set but Mike provides heaps of nifty little tips.
Even if you don't buy his LHS set or any of the other BA offerings it's worth watching if you intend to build any lazercut MDF buildings


Let's now talk value for money.
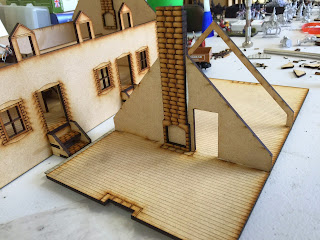
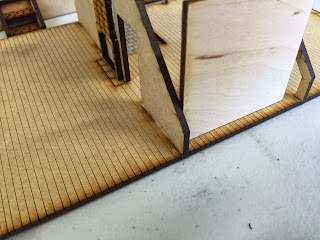
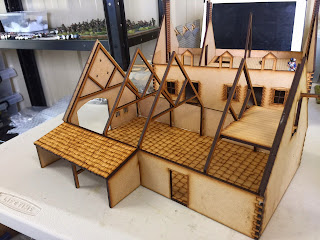
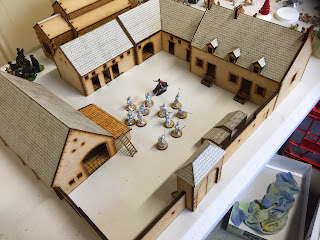
I've seen both models constructed.
To be honest there is really nothing in real 'model quality' to split them. Both are nice models. Both appear relatively easy to construct.
Both are made from quality materials.
Looking at the building instructions shows that the BA version is a more detailed model in regards to building interiors, with interior walls, lofts and staircases in some buildings.
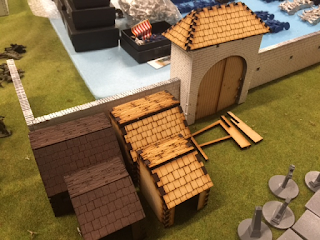
The WLGs model has several carts and pieces of furniture which are nice.
Both models are very suitable to skirmish style games.
But what leaves me feeling that the BA model is better value for my money is the bottom line price.
The BA version retails for $175 AUD plus a flat $15 postage domestic or $25 international.
The WLG version costs $385 AUD plus postage. I've no idea on what postage to us here in Australia will be. I'd buy it directly from WAR AND PEACE GAMES here in Australia and save on postage. Besides, WAR AND PEACE are great to deal with.

Yes,.. WLG gives you 62 miniatures and YES you get a plough, two nifty carts and some furniture but I personally don't need 41 extra French infantry and 21 KGL riflemen.
Even if I did I'd rather purchase my miniatures from Perry to match the rest of my Napoleonic collection. I'm not saying the Warlord games miniatures are not nice, but what if my collection is Perry, or Victrix, or Front Rank?

And what if I want the farmhouse for playing WW2 games exclusively because Napoleonic's just ain't my thing.
Well, you get the idea.
The other issue for me is also the fact that the BA version is Aussie made!
That's right! Home grown Aussie made terrain!
For me supporting the domestic manufacturers such as Eureka Miniatures, Adventure Miniatures and Battlefield Accessories is important.

All that said, IF I was recently getting into Napoleonic gaming AND I was a fan of Warlord Games miniatures (and they are fine miniatures just not to my taste) then the WLGs battle set is a good starting point. Even more so if your rules of choice are BLACK POWDER.
Also consider looking at the WLGs COLLECTOR Edition of LHS.
In that set you get even more miniatures and some nice additional terrain pieces including the famous 'Sand pit' that riflemen from the 95th fought.
Plus:
Resin pile of dead Frenchmen (used by the King’s German Legion to block the gateway after they burnt the gates for warmth the night before!)
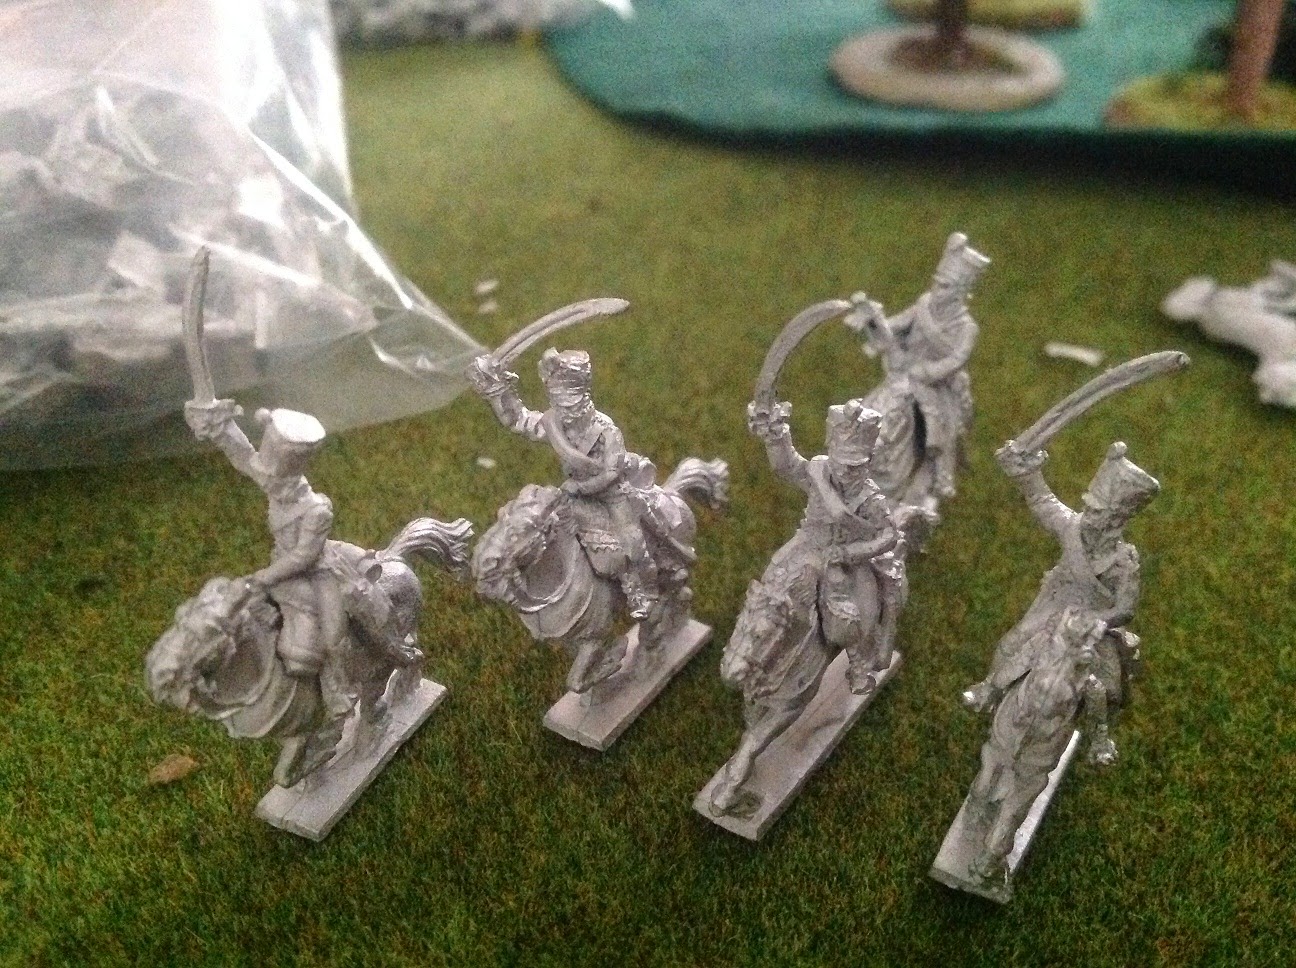
6 French Voltigeurs skirmishing
Marshall Ney (Bravest of the Brave)
4 French casualties
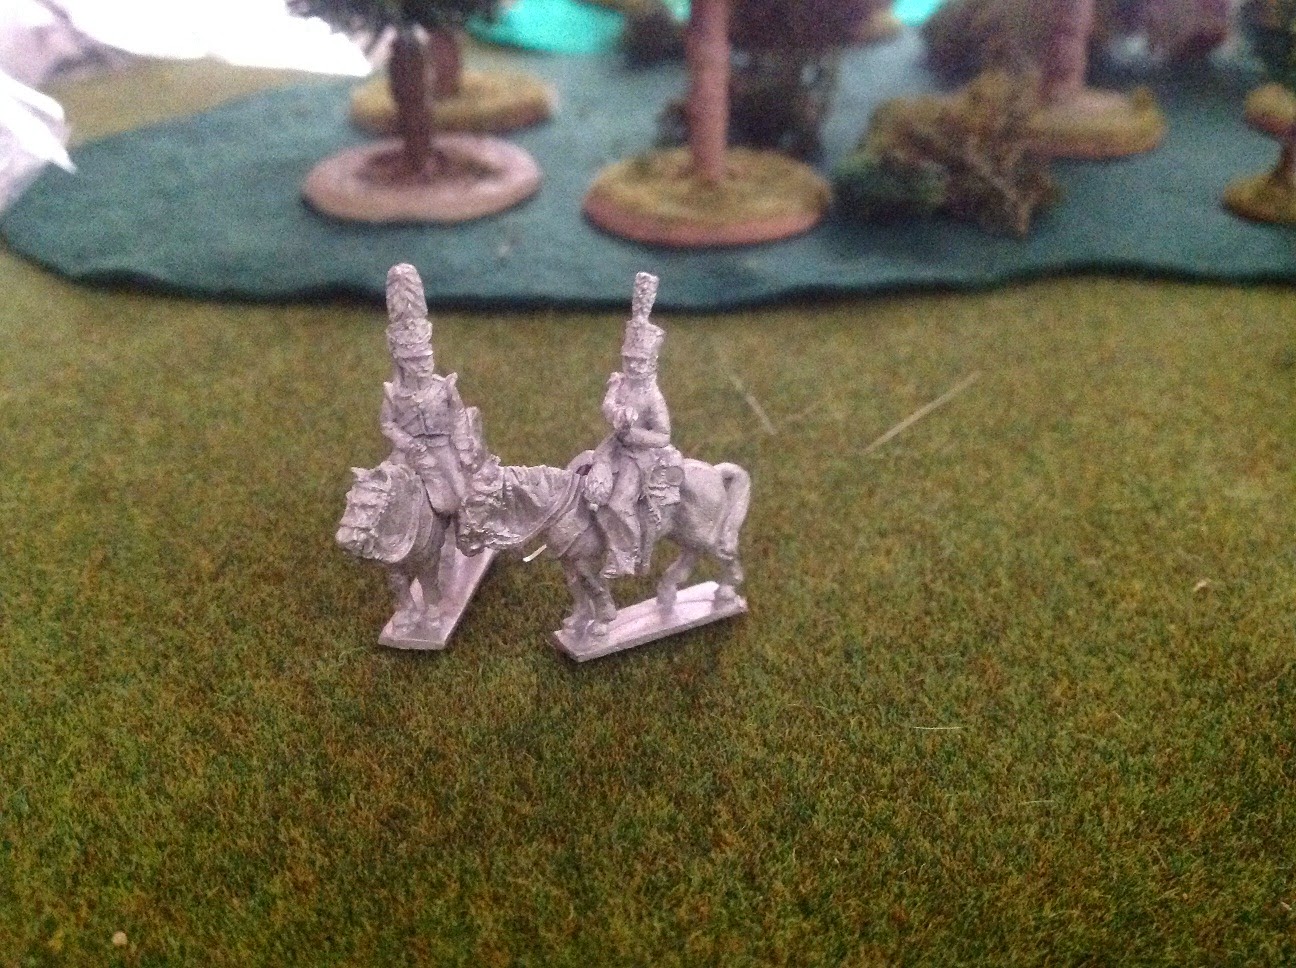
Mounted French Officer
36 plastic French Line Infantry (6 metal command and 30 plastic infantry)
6 Luneberg Light Infantry
6 British 95th Rifles
1 British Rocketeer and a horse.
1 Nassau officer using cooking pot to extinguish the barn fire (exclusive metal model)
6  Nassau infantry
36 plastic Hanoverian Infantry (6 metal command, 30 plastic infantry)
Farmer’s wife tending young calf (exclusive metal model – she refused to leave the poor newborn and stayed with it during the battle…)
Abatis branches
Cost? $478 USD. I suspect it would sell here in Australia for around the vicinity of $525-550 AUD, but I must stress I'm just speculating on the Aussie $ cost.

Now, as we progress with the review I will look closer at the miniatures that come in the Warlord Games sets but for now let's just focus on the Farm Buildings because let's face it, this isn't a figure review.
So that's all for now.
In my next post we'll look at both construction and a side by side comparison of the two sets.

I'm Back!

$
0
0
Hi Team
Well, as you may have noticed its been about 6 MONTHS since my last Blog Entry.
STREWTH!!!
Sorry about that.
I was recently discharged from the army after 32 and a bit years of service and the adjustment has been a challenge.
Furthermore my treatment for Post Traumatic Stress Disorder (PTSD, the reason for my discharge) has also been something that has required a bit of 'adapting' to.
Anyway, I'm back now and have a fair bit of stuff of a wargames nature to share, which I will do very shortly.
A huge thanks to my wife who has got me through this,....


Reviews a'plenty PART ONE

$
0
0
Hi Team
I've a couple of reviews I need to share.
First I need to tell you about a FANTASTIC Painting service now available here in Australia.
My good mate 'Gunner Dunbar is now taking Commissions to paint your miniatures.
I've been having miniatures painted by Dan for some time now and I can tell you that he's the most talented artist I know who is currently 'painting for profit' at a price that wont cause your Minister For War and Finances to have a meltdown.
He is talented, quick, outstanding value and his communication with you the customer is beyond anything I've experienced with other painting services.
Not only will he paint your miniatures but he will modify them and or build them.
you can see Gunner Dunbar's rates and examples of his work here:
GUNNER DUNBAR PAINTING SERVICE
http://gunnerswargamming.blogspot.com.au/2015/03/now-taking-commissions-gunners-painting.html
 Here are some photos of just some of his outstanding work:


ABOVE: AB Miniatures 18mm Wurttemburg Light Infantry
BELOW: Converted AB Miniatures 18mm Bavarians. Heads swapped to create Bavarian Guard Grenadiers

ABOVE AND BELOW: Tartan!!!!

ABOVE AND BELOW: Converted PERRY MINIATURES rifles to represent Richard Sharpe's men. 

I can't recommend Gunner Dunbar more highly.
I rate his standard as 'SHOWCASE'.
There is a LABLE below (Dan Dunbar) where you can see more examples of his work!
5 out of 5!

Next I'd like to make mention of a new TERRAIN supplier.
Let's face it, most of us neglect that aspect of wargaming.
For the most part we insist on having at least half decent miniatures on our tables but then we drop the ball an use shoddy terrain.
Either we cant afford the good stuff, or we lack the time and or effort / skill required to make affordable stuff.
Good news.
Now you can purchase ready made, 'Good to Go' wargames quality terrain from STANLEY'S TERRAIN
No need to assemble or paint it. Just take it out of the box it comes in and place it on the table.
No, its not a 'Museum Quality' stuff,.. but its serviceable and value for money.
Here's some samples:


I myself have purchased a Minefield and a walled field / enclosure and I'm very happy.
Highly recommended.

Reviews a'plenty: PART TWO

$
0
0
Hi Team
Yet more reviews
Yesterday I was out at EUREKA MINIATURES and as usual I was treated to a sneak peek at some of the upcoming releases and some of the currently available but not well known products
Firstly a look at some cute 'Pulp' characters.
I really like the female sculpts that EUREKA produce. The always look so 'Girly' rather than simply male figures with longer hair and breasts.
These US G.I Janes' are excellent examples:
The ladies can be purchased with backpacks and Garrison Caps / bareheaded or if you're so inclined with Rocket Packs and 'Futuristic' helmets.
BELOW: The MG Team is my favourite.
I can just see this young lady lying prone behind this MMG with her feet casually swaying to and fro as she sends some tracers down range,...
BELOW: Seems Rosie the Riveter is not content on the production line anymore,...
She means to do some harm to the vile Nazis with her spanner!

Now Last time I posted I mentioned that GUNNER DUNBAR (GD) was now taking commissions to paint miniatures.
I recently sent him some EMPRESS MINIATURES 28mm Modern Australians.
The EMPRESS MINIATURES are very nice sculpts and the fit in very well with my predominantly EUREKA MINIATURES Afghanistan Campaign collection.
Firstly to the actually painting that Dan did.
I'm simply blown away at how well GD captured the Disruptive Pattern Camouflage Uniform  (DPCU) 'Oz Cam' pattern.
Not only are the colours and pattern spot on, but they subtle shading and subdued style works perfectly in this scale
He also added Goggles to the Helmets (with Green stuff I suspect) free of charge and without my prompting!!!!
How cool is that?! I mean, it hadn't even crossed my mine to request the modification but it's an obvious one really as ALL Australian Troops are issue Eye Protection as standard and no Digger would leave his FOB without them on him.
(Mods were done AFTER these photos were taken)
I could have had them painted in DigiCam, DPDU (the 2nd 'D' is for Desert) or DPCU.
I chose DPCU as it was the most common pattern used throughout Australia's commitment to OP SLIPPER (2001-14)
The photos speak for themselves.
Again, I cant recommend GD highly enough.


 BELOW: DPCU (left) DPDU (right)

Now as for the actual miniatures.
They are excellent.
As far as I know no one else does Aussie Diggers in 28mm apart from some SASR types that EUREKA do on Motorcycles and Quad Bikes
The sculpting is crisp with little flash to speak off. The range is comprehensive and there are no 'silly' poses.
One criticism,...
No self respecting Digger would EVER use his master hand to make a hand signal.
This chap below would get his arse so kicked by the Platoon Sergeant to using his master hand and taking his eyes away from where his muzzle is pointing whilst on patrol!!!


I purchased these Diggers from ELITE MINIATURES AUSTRALIA whom I HIGHLY recommend to anyone in Australia or New Zealand!
Service is OUTSTANDING and the owner Nathan is a top bloke and Ex Australian Soldier so he knows his stuff.
Anyway.
That's all for now.
More reviews shortly including a look at Chain Of Command V Bolt Action.

Reviews a'plenty PART THREE!

$
0
0


ABOVE: LASER TOUCH markers on the Left, and TFL Markers on the Right, as modelled by Corporal Harris wearing khaki in 28mm

Hi Guys
Continuing with my reviews I thought I'd mention a new manufacturer of 'Gaming aids' here in Australia.
Laser Touch create gaming aids / 'Markers' for wargamers, and other useful things like Foam Cary Trays.
Craig is the man in charge.
I noticed he created markers for 'BOLT ACTION' so approached him about making markers for 'Chain Of Command' (CoC).
It took a while but eventually I was able to have the following markers produced:

Patrol Markers
Tactical Movement
Covering Fire
Overwatch
Immobilised
'Shock'

Laser Touch Produce 'CoC Token Sets' and Patrol markers (a bag of 4 'Large' Markers) with your Army / Formation's symbol.
There are plenty to chose from including:

 SS
Soviet
Jap Army
Brit 8th Army
US 82nd Airborne
US 101st Airborne
German Luftwaffe (FJ), and:
US 29th Division
  just to name a few.
ABOVE: Again the Laser Touch markers are no the Left with the TFL markers on the right.
The Markers themselves are attractive, sturdy and practical.
Each token set comes with 3 each of the 'Tactical Move, Overwatch, Covering Fire and Immobilised' markers and 20 'SHOCK' (blood splatter) markers.
Each set retails for a reasonable $38.50 AUD.
PATROL MARKERS are available separately
I recommend you check Laser Touch out,...

 
 ABOVE:"Despite some 'shock' Lancer Corporal Jenkins maintained overwatch". 
 ABOVE AND BELOW: "COVERING FIRE"!
 BELOW: "Cpl Tomkin's lads moved tactically down the village road",...
 BELOW: Various 'Wound / Shock' tokens. Top: Laser Touch Blood Splatter, Middle: Gale Force 9 I think. Bottom: TFL.


Reviews a'plenty PART FOUR

$
0
0
Flags, Faces and Bases!
That's what makes your miniature armies 'pop', or so I've been told.
In this post I'll talk a little about bases and how they can be improved with the addition of some nifty little 'Tufts' I recently discovered.
Leadbear's Tufts are small foliage 'tufts' that you affix to the bases of your miniatures.
They come in a variety of colours and types including 4 shades of Green (including Yellow Green, Light Green, Dark Green) and Beige / Tan.
There is also 'Stoney Tufts' and 'Flowering Tufts'
They are super easy to use.
Simply peel them off their sheet and apply directly to the miniatures base.
Unlike other tufts I've used these don't require any additional adhesive and contour nicely to the base surface.
These truly are the best tufts I've used and are very reasonably priced

BELOW: Just some of LEADBEAR TUFTS


Here are some details on the tufts I obtained directly from Barry at LEADBEAR.

Tufts - Mix (Qty: 140/pack)
These tufts are approximately 4mm high with an additional scattering of a lighter coloured 6mm long static grass to give some contrast.
Beige
Light Green
Green
Dark Green
Dry Grass
Wild Grass

Tufts - 6mm (Qty: 120/pack)
These tufts are approximately 6mm high with a scattering of a lighter coloured 6mm static grass to give some contrast.
Beige
Light Green
Green
Dark Green
Dry Grass

Tufts - 12mm* (Qty: 55/pack)
These tufts are approximately 12mm high.
XL Beige
XL Green
XL Dark

* There is a major discrepancy with regards to the quantity of tufts supplied in the retail packs (55) and the packs I sell personally to friends, via various forums and on eBay (80). However, with the packs sold via retail outlets you receive tufts and larger patches, whereas you only receive tufts when I supply direct.

Flowers - (Qty: 100/pack) 20 each of Red, Pink, Yellow, White, Purple.
Leafy Tufts - (Qty: 100/pack)
Leafy Tufts with Purple Flowers - (Qty: 100/pack)
Leafy Tufts with Red Flowers - (Qty: 100/pack)
Stony Tufts - (Qty: 64/pack)

I plan to add the following to the range - Stony Tufts with Flowers, along with 2mm and 4mm tufts.
As I wrote, I do like people to support the retail outlets which are currently, Eureka Miniatures in Melbourne and Military Hobbies in Adelaide, but I understand this isn't always possible, therefore, I can be contacted at leadbear@internode.on.net

HIGHLY RECOMMENDED!!!

BELOW: Some photos of some 28mm 'Jerries' based using fine sand washed washed with a dark brown ink and slightly dry brushed. I've added just LEADBEAR tufts so you can see how they look.


A Tale of Two Farms. PART 2

$
0
0
ABOVE: Two Perry Miniature 28mm French Infantry scope out the barn. How much blood will be spilt capturing the place?

Hi Team
Well, its been some time coming but finally I've arrived at PART TWO of my review of both BATTLEFIELD ACCESSORIES (BA) and WARLORD GAMES models of La Haye Sainte farm sets.
After comparing contents of the two sets in PART 1 in this and following posts we'll look at construction and the level of detail in the respective models.
Let's start with the Aussie offering from BA.

One of the things I really like with BA's models is the VIDEO tutorials on construction you can access via YouTube.
These are a real God send!
As you can see I watched the videos on my IPad as I constructed the kit and the little tips on construction are simply excellent.
Construction proved to be pretty simple. Honestly there wasn't anything tricky here. Anyone with even the slightest experience in model construction would find assembly pretty straight forward.
Assembly was rather intuitive for the most part.
I was impressed with the details included in the models including interior walls and staircases and lofts in barns.
Ensure you have a good PVA / White Glue, (I like Selleys), an old paint brush for cleaning up any access glue, and PEGS,... lots of pegs!!!
I also found rubber bands to be useful tools as you can see.
I found the model to be simple to construct (did I mention that).
I assembled the ENTIRE farm set including sheds, walls, main gate house, farm house, Coach house, barns etc in a single day. I started at 9 am and was finished by 5pm including a hour long lunch and a couple of brews.
It's fortunate that assembly is so simple and that the videos on YouTube are available because there are no written assembly instructions to speak of, just photocopy images.
The detail available in the photocopies is rather poor but ultimately it wasn't an issue so "Meh".
ABOVE and BELOW: Probably the trickiest part of the assembly, the roof and second story windows.
BELOW: I did say LOTS of pegs.
BELOW: The second story of the Main farm House.
TIP:For ensuring you get walls squared to the floor I use a laser cut 60mm square base and use it as seen below. By butting it up agains the wall as it sets you get a perfect Right Angle / 90 degrees.
TIP:Use some of the 'Punched Out' off cuts as braces for internal walls. Not really required but it cant hurt IMHO. 
BELOW:A nice view of the interior of one of the barns

BELOW:Two of the nifty little shed that but up against the farms walls.
I believe these might eventually be available as separate items to add to 'other' BA models.
The overall quality of the entire set is EXCELLENT and is well worth the asking price.
ABOVE: The COMPLETE FARM SET
Part Three will cover the WARLORD GAMES La Haye Sainte model and a direct comparison of the two farms side by side

A Tale of Two Farms. Part Three

$
0
0

ABOVE:The Duke inspects the BA farm house (left) and the WLG farm house on the right

Hi Guys
Well we're finally here. Part 3 of my review of the WARLORD GAMES (WLG) and BATTLEFIELD ACCESSORIES (BA) La Haye Sainte Waterloo (LHS) farm set.

A reminder I'm just reviewing the actual MODEL that comes in the Box Set, which also includes plastic and metal miniatures (see PART ONE).

The first thing I noticed when I commenced construction of the WLG kit was the poorer quality of the material compared to (BA) kit (see PART TWO).
This kit from WLG is made from a much thinner and flimsier material. It's more like really thick cardboard rather than the thicker MDF(?) type material in the BA kit.  
BELOW: Compare the pair. BA material on the left and the thinner WLG material on the right

The instructions however are a different story. They are very professionally produced and assembly is simply as long as you follow the instructions. You could probably get the job done without the instructions but hey, they are provided, they are clear and easy to follow. 
BELOW: BA farm house on the left and WLG on the right

The level of interior details on the WLG version is very light on in comparison to the BA version.
Actually, apart from some interior walls within the Stable there is no interior details at all.
No second floor in the Farm House. No loft in the barn.
All of the various buildings are set upon 'bases' that interlock with the other bases upon which the other buildings are built.
This makes for a sturdy base however it does limit the versatility of the set. I want to be able to use the various buildings as stand alone buildings for other games like CHAIN OF COMMAND, FORCE ON FORCE or BOLT ACTION for example.

 ABOVE and BELOW: The WLG Farm House. No steps leading into the house, no interior details / walls and no second story. Just a big empty shell.


 ABOVE and BELOW: The Main Gate / Gate house. 
Best bit? The gates are hinged and freely swing open and shut. Cool!
Worst bit? Its affixed to this big arse base!

Construction was knocked over pretty quickly and took about two thirds of the time it took to assemble the BA version.
The roof construction was particularly easy.
If I could have the same system of roofing for the BA model I'd be beside myself. WLG version is much simpler and more robust I think.
BELOW: The WLG Barn and the BA Barn. Notice the loft in the BA version on the right.

 All in all however the BA Model is much more impressive and more robust due to the higher quality of the materials used in construction. Only the roofing is superior in the WLG version.
Furthermore the level of detail is superior in the BA kit.
Also the 'Online' support from Mike Parker is great, what with the Video Tutorials on YouTube and his own Facebook Page (search 'Battlefield Accessories').
You do however get an additional wall and small building (cook house maybe?) with the WLG version.
I'd be very keen to see which is the more historically correct kit.
The WLG LHS does come with a few extra pieces worth mentioning.
Two wagons, a small plough, three tables and six chairs, (for barricades or dinner), and some branches for barricades.
Also, you get some cardboard 'detailing' items for creating open shutters near windows and framing for windows and gates etc. (See Below)

 ABOVE and BELOW: Details of the WLG LHS farm yard and 'extra' bits.

 IN CONCLUSION

I think that the BA set is of better quality, more versatile, more detailed and excellent value for money.
The WLG offering is slightly easier to assemble (particularly the roofs) but isn't as flexible due to the individual buildings being affixed to some rather large bases.
Furthermore the BA set is the Farm Set and the Farm Set alone.
The WLG set comes with a swag of miniatures that you may not need or like.
The wagons and furniture are nice, but I can always purchase those things if I want them.
For me it's the QUALITY of the buildings / models that clinches the deal and why I give a nod in the direction of the BA version.
If however you do like the Warlord Games Miniatures and you're not too fussed on the detail of the actual farm itself the the WLG set is certainly worth considering.
As they say,...
"Ya pays ya money and ya makes ya choice".


 ABOVE and BELOW: The complete WLG LHS Farm set with roofs ON (above) and OFF (below). Notice the extra length of wall and small building in the bottom right corner


BELOW: The complete BA LHS set. Roofing removed. Noticed the second story in the farm house, and loft in the barn and small room in the stables.

 BELOW: Both the WLG (left) and BA (right) complete LHS Farm sets

I hope you find this review useful.
If so feel free to make comment.
UBIQUE!

Skuttlebut

$
0
0
Hi Guys
Well I've returned from my trip to Belgium and did the whole visit Waterloo thing.
Some good news first from Mike Parker at BATTLEFIELD ACCESSORIES who has produced MDF roofs for his outstanding La Haye Sainte Farm Set.
you can see  my review of the Original Farm set here:
LA HAYE SAINTE

Here are some photos of the new roof sets
Much easier to construct and sturdier.


 BELOW: The original 'Sheds' with card roofs in brown and the replacement set with MDF roofs. Also the replacement roof for the farm's main gate.
 BELOW: The MDF Roof kits.


 BELOW: The new MDF Sheds

I also popped into EUREKA MINIATURES and these chaps caught my eye.
I have no idea what they are, but who doesn't want a trumpet being played by a portly chap using his arse and a horse being ridden by a giant rat bursting out of a corpse?


Finally, Eureka are also producing these awesome WINGED and 'Mechanically Enhanced' GORILLAS!


Viewing all 81 articles
Browse latest View live