Quantcast
Channel: Trailape's Wargame
Viewing all 81 articles
Browse latest View live

Trojan War Notables

$
0
0
 Hi All
I thought I'd share some photos of some of my Trojan War 'notables'. All the miniatures were painted by 'Gunner Dunbar'. They are all either Wargames Foundry or Redoubt Enterprise miniatures.
I've based these individually as I think I'll use them for some kind of variation on Two Fat Lardies Dux Britanniarum rules.
BELOW: PARIS and HECTOR.
 BELOW: Paris comes a cropper,... thank goodnes for dodgy chinstraps. (For those that don't know the story, Paris comes off second best in a duel with the King of Sparta, but his chinstrap on his helmet 'snaps' and he's able to do a runner back to brother Hector)
 BELOW: King Piram of Troy and Helen of Troy, (late of Sparta).
 BELOW: Piram, Helen Hector and Hector's Chariot Runner, (who shall remain nameless for now).
The Foundry miniatures are really nice but OUTRAGOUSLY expensive for an historical 28mm miniature. The Redoubt Enterprise miniatures are also very nice.
Comments Welcomed.
Cheers

SAXON WARBAND: for Dux Britanniarum

$
0
0
ABOVE:A relaxed Saxon Lord (Eureka Miniatures 'Beowulf' Character)
Hi All
Well I've been busy. I always get busy after discovering a new set of rules from the guys at Too Fat Lardies.
This time I've been working on my Saxon Warband for TFL's Dux Britanniarum rules. The rules aim at simulating (or gaming) the situation as it stood in England after the departure of the Romans when the struggle for control of the island was between the Romano British ('Romanised' Brits) and the 'Raiders' / invaders from acros the sea, (in my case the Saxons).
To build my Warband I've used a mix of EUREKA MINIATURES and FOUNDRY MINIATURES. There is also a couple of BLACK TREE DESIGN (BTD) Miniatures included.
I used the EUREKA Minis to provide my 'BIG MEN' (Characters such as the 'Lord' and his two trusty subordinates / Nobles. The Beowulf Collection has some cracking good figs, and you an see they come in both 'Casual and attacking poses. Consequently I've painted doubles of my Lord, Nobles and Champion.
BELOW:A not so relaxed Saxon Lord (Eureka Miniatures 'Beowulf' Character). He means business!

 ABOVE AND BELOW: My 1st Saxon Noble in both relaxed and attacking poses. He kind of reminds me of the Saxon Lord / Chief from the move King Arthur

 ABOVE and BELOW: Saxon Noble number 2. Again relaxed (above) and attacking (below).


 ABOVE and BELOW: My Champion! Ok, he's a bit out of shape, but he's a scraper.

 ABOVE and BELOW: The 'Command Team in both casual and Attack poses.


 Next we have some photos of the Saxon Hearth Guard. These two bases of six miniatures each are my 'Elite'. about a 50-50 split of both Eureka and Foundry miniatures. They mix rather well.


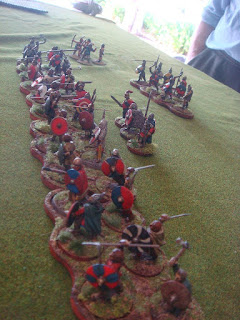
 Finally here are some photos of my 'Warriors. Three bases of six miniatures each. You'll notice one base can accommodate 8 miniatures. This base is the one that I would use for a group of 6 miniatures and The Lord and his Champion (totalling 8 miniatures).

 These guys are almost all Foundry, but there are two BTD and a Eureka Miniature in amougst them.


I should add I painted them thus:

Start by undercoating in Matt black. Make sure the miniatures are completely covered, (this is important).

Dry Brush 'silver' on those minis in Chain-mail

Now block colours are applied, including ‘Dark Flesh Tone’ to skin areas, Reds, Greens, Off Whites, Greys and Tans and 'British Khaki' etc on clothing, and painted spears, swords and helmets etc.

I then applied a single 'Highlight'. For example a 'Lighter' shade of skin tone to the forehead, cheeks, back of hands etc. I also added some nice little 'trimmings to a few of the minis, such as the blue trim on this chaps shirt tails below.

Dipped.

Sprayed.

Based.

Shields painted using method above and attached.

Bases flocked.
DONE!
I wanted these guys to look like they had been campaingning / raiding for a while.

I painted these guys up very quickly, (about 4 days) using the ARMY PAINTER method. Probably took in real time about 6 hours, including basing.


Finally I've uploaded a photo of my Romano British Lord, together with two of his subordinates and his standard bearer, (nt needed in the game but a nice bit of eye candy all the same).
I'll get to work on the Romano Brits and the Saxon skirmishers (I need four) very soon.
The guys below are FOUNDRY miniatures

As usual, comments are welcomed.
Cheers

CALPE MINIATURES: Prussian Landwehr WIP (Part 1)

$
0
0
 Hi Guys
I purchased a HUGE amount of CALPE MINIATURES last year whilst I was overseas and was impressed with the quality of these 28mm miniatures. I have enough to build a Lasalle Prussian Division with a couple of supporting Brigades. I should add I've got a few Warlord Games miniatures added for some variety, though it's not really required as the variety in poses in the CALPE range means I can have a Battalion of 24 miniatures with every miniature different!!!
You might also notice the mounted PERRY MINIATURES officer. He will be an ADC, so not part of this battalion.
I thought I'd try a different technique painting these guys.
I start off with undercoating them in a matt black, (citadel in this case) and then dry brushed them with Prussian Blue paint from Vallejo.
Next I fill in the 'block colours' such as exposed flesh, white / brown on the pants and grey blanket rolls etc.
Once I've done that I'll probably dip and spray just as with the Army Painter method.
Anyway, in short they are excellent miniature and a real joy to paint (so far). These guys are right up there with the PERRY's. Maybe even better.
I'll keep you posted on their progress.
Early days, but I hope to have them painted withen a few days. A big ask as it's a busy time for family commitments. We shall see.

Comments Welcomed!
Cheers

Front Rank Bavarians & a Eureka Hussar

$
0
0
 Hi Guys
I recently picked up six painted FRONT RANK Barvarin Light Infantry up on EBAY. A quick re-base and they are ready for a game of SHARP PRACTICE (SP) or maybe SONG OF DRUMS AND SHAKOS (SDS).

 I also finally got around to painting a EUREKA MINIATURES dismounted Hussar. He's not painted to represent any particular regiment, just a bit of fun really. He's a nice miniature I think.
 I'll call him Captain Fleshman! I'm sure he'll make his way into a few SP games.
As usual comments are welcomed.
Cheers for now.

M777A2: Into Service- Into Action Print.

$
0
0
 Hi
Well now I'm just showing off, but I recently posted out of my unit the School of Artillery.
The CO and I had our farewell from the School today and were invited up to the Soldier's Club to say farewell.
I was very pleasantly surprised to be presented with a farewell gift from the Soldiers and Junior Non Commissioned Officers.
 I was presented with a wonderful framed print of the M777A2 155mm Gun we've recently introduced into service. It also came with a Certificate of Authenticity.
The original painting hangs in the School of Artillery Instructional Block and was painted by the very talented Barry Spicer.


 This print now proudly hangs on the wall of my study.
I was gobsmacked to get this farewell gift.
The soldiers at the School of Artillery really are a great bunch.

Farewellensburg: A MAURICE AAR

$
0
0
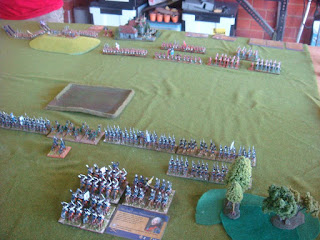
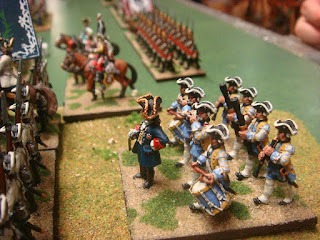
ABOVE:The Battlefield as seen from my Right Flank. I attached one notable to my Guard Du Korp Cavalry Regiment. Just prior to the the start of the battle an additional Regiment of Foot joined the Grenadiers on the right. The 'Green' Regiment of Foot Musketiers
 
Hi Team
I thought I'd take the opportunity to share another After Action Report (AAR).

This time it’s another MAURICE Game report. Stan and I decided to use two late 18th century Imagi-Nations. For this game I'll be using my 1806 Prussians as the Imagi-Nation '1780ish Germanic' State you may recall as 'The Electorate of Clements Unt Edwarts'.

My 100 point Army will look like this:

3 REGULAR ELITE Infantry (1st 2nd and 3rd Grenadiers)
3 REGULAR TRAINED Infantry (The Red, Yellow and Blue Brigades)
3 REGULAR TRAINED Cavalry (Guard Du Korps, the White Dragoons and the Blue Dragoons)
3 Artillery Battery’s

My National Advantages are (and with suitably 'Germanic' renames):

LETHAL VOLLEYS (or"Tod Feuer")

STEADY LADS (or “Hold Fast Mien Kinder”)

La BAIONETTE (or “VORWARTS”!)

Notables:

Two each. :)

Some notes on Army composition. This Army is a re-think of my previous version where I had more Artillery (4 Guns) and an ‘Irregular Infantry’ unit. Again I have made INFANTRY my dominate arm as I believe they are more powerful and versatile in this period than cavalry. Six infantry Units (Regiments or Battalions) will give me ample firepower when combined with 3 Artillery units (Batteries). Add 'LETHAL VOLLEYS' to the mix (the ability to 'Re-Roll' and failed disruption) and I think defensively the Army's firepower is quite deadly. All this firepower does come at a cost, and it means only 3 trained cavalry could be purchased. I upgraded 3 of my Infantry to ELITE and exchanged ‘CLERICS’ and ‘ARTILLERYACADEMY’ with ‘STEADY LADS and La BAIONETTE. Total cost 99 Points. What you end up with an army suited to both the DEFENCE as well as ATTACK in my humble opinion. If I did end up as an attacker, then as such I would be entitled to the support of a Mercenary unit of either Infantry of cavalry so could increase my stock of horsemen that way. As it turned out for this battle I took an extra Regiment of Infantry.

Stan created the Free State of Northern Virginia, (FSoNV) looking very much like a mix of American Revolutionary War British and Continental Regiments? Apparently they have no issues with taxation without representation, meh.
His Army consisted of:

1 REGULAR ELITE Infantry 
5 REGULAR TRAINED Infantry 
1 REGULAR CONSCRIPT Infantry
1 REGULAR ELITE Cavalry
2 REGULAR TRAINED Cavalry  
3 Artillery Battery’s
1 Irregular Infantry Unit of Rangers (the town Garrison)

The FSoNV National Advantages were:
OBLIQUE MOVEMENT
MASION du ROI
and
LETHAL VOLLEYS

ABOVE:The battlefield as seen from my left flank.

Stan won the toss and decided to defend, so I picked another Infantry battalion to add to my force, (the Green Brigade).

The objective for me was to seize the town of Farewellenburg. My plan was rather straight forward. Break Stan’s Army or take the objective.

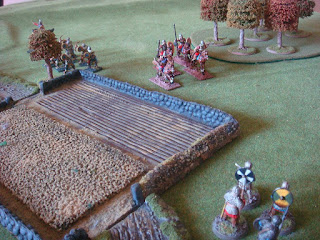
Stan massed his horse on his left. This was also the most likely approach to the Town for me, as attacking up hill in the face of three Artillery batterys wasn’t terribly appealing for me. Cavalry don’t shoot and in a headlong charge at my Infantry I was confident my chaps would have the better of the confrontation. I massed my Grenadiers together with the Green Brigade to lead the attack on the right (Stan’s left). My Artillery would sit behind the rough ploughed fields and support the attack on the right or aid in the defence of my left, which I decided to refuse.

My Cavalry would support the assaulting Grenadiers.

Success depended on how well my ‘Shock’ troops would do. If I could crack the FSoNV Cavalry and the infantry before Farewellenburg then I stood a reasonable chance of driving the enemy from the town. If Stan was forced to bring troops from his right to sure up his left then I might rout enough of them to break his army and make capturing the actual town irrelevant.

The battle opened with an advance by my force of Grenadiers on my right. Stan immediately charged them with is Regiments of Horse. After about three or four rounds of combat I had lost one Regiment of Grenadiers, but all of the FSoNV Cavalry was destroyed, and both of the enemy’s notables were either dead or fleeing the field. Stan started with an Army Moral of 13, but it was already down to about 6 or 5!
My Army Moral was still in rather good shape, with a fall from 13 to 11.

As the FSoNV Cavalry was battering away at my Grenadiers, Stan marched almost his entire infantry force from his right flank across to his left to confront my victorious Grenadiers.

BELOW:Stan's cavalry charge my Grenadiers,......
BELOW:And the results are: Scratch three regiments of Horse and one Regiment of Grenadiers. Stan's Infantry move 'Retrograde'. soon they will be engaged by my Grenadiers also.
Not content with destroying just Cavalry, my Grenadiers charged forward with the Bayonet. The use of a couple of “For The King” cards and a very appropriate “Grenadiers Forward” card saw the FSoNV infantry on Stan’s left flank swept away, for the loss of another regiment of Grenadiers. This was almost enough to push Stan’s army over the edge, with his Army Moral at 1. It was at this point a much beloved noble in the FSoNV Army was carried off with a shot to the head from Feldwebel Stammer of the 1st Grenadiers, (I played the'DEATH OF A HERO' Card). This proved too much for his army and they routed just as his infantry from his right flank redeployed in preparation to repulse the battered Grenadiers. I ended the battle with my Army moral at 8.
ABOVE and BELOW: My Grenadiers close in on the FSoNV infantry as more of their Infantry redeploy from their right flank to the threatened left.
BELOW and BOTTOM:The situation at the end of the battle.


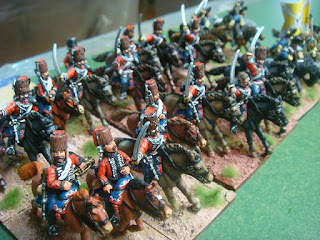
FYI, my army is all AB MINIATURES 1806 Prussians. Stan's army is a mix of Minifigs and Old Glory. There might be some ESSEX miniatures in there also.
As usual another fun game of MAURICE. All over inside 3 hours. We were left with enough time to get a game of Dux Britanniarumin. More on that in my next post.

Comments Welcomed.
Cheers

Village Raid! A Dux Britanniarum AAR

$
0
0
ABOVE: The Saxon raiders arrive at the sleepy village of Stanfordium; "Anyone home"!
Hi Guys
As some of you might know I've always been a huge fan of all things 'Too Fat Lardies'. Their rules and Scenario books, and 'Summer Specials' etc are quite choice. If you can afford them, (and you can 'cause they are also sooo afordable) then I highly recommend their tasty treats.
One of their more recent offerings has been Dux Britanniarum, which one can use to game / simulate war in Romano Britain just as it's all falling apart at the seams.
The rules come with an exceptionally fine campaign system and my usual gaming buddy Stan and I jumped straight in.
I can't recall if I picked or had forced on me the option to be the Saxon Raiders, but either way I do like them.
Obviously Stan picked up the Romano-British.
Characters were generated; a Lord each and two subordinate 'Nobles' and we were off.
The first encounter was a raid on a Watch Tower that resulted in a victory for me, with a Brit Noble being carried off for ransom, (after Cedric the Confused had his way with him).
After that was a raid on a church. This was a real ding-dong afair that resulted in a lot of dead on both sides, and a 'drawn' result. We now have some nice leadlight windows back at the Great Hall in Germany.
That brings us to the third raid. This time a village raid.
ABOVE:First housesearched "O Bugger it, nothing here but moldy bread and stale ale. And what a mess!  HOW DO THESE PEOPLE LIVE LIKE THIS"!!!

We had two turns head start on the Brits, which was enough time to get to the edge of the village before the first of the Brits arrived to try and spoil the party. The first building was entered by the Saxon Loard, his Champion and his Hearthguard and their searched revealed nothing, but the large villa (essentially classed as two buildings) being searched by the 2nd Hearthguard came up trumps two turns in a row (rolling a 6 and then another 6)!!

BELOW:Olaf the Bloated grabs a wife and a refreshing beverage as two of his mates engage in less civalized pursuits. Savages.

ABOVE:Saxon Lord and Champion together with two of his Hearthguard survey the Saxon Archers in the woods.
BELOW: The British arrive in force
BELOW:The Saxon warriors pour into the village.
While the villa was being plundered my archers started peppering the oncoming British without much success, and before you could say, "someone might lose an eye" the 2nd group of Hearthguard was making off with armfulls of loot.
As this was happening the Saxons sent a group of Warriors to pounce on a group of British Levy who had advance to close before forming a shieldwall.
Surprisingly they managed to give as good as the got and both groups virtually destroyed each other!
As this was happening another group of Saxon Warriors entered the villa to collect their share of loot and were about to exit when they found their exit barred by a group of British Warriors.
ABOVE:The 2nd Hearthguard make off with the loot.
BELOW:Warriors attempt to leave with the second lot of plunder but some British Warriors think not!
BELOW:Warriors V Warriors. It started pretty well for the Saxons and then as was the recurring pattern of my day, it went south quickly.
These two groups again butchered each other. Initially the Saxons seem to have the better of it, but yet again the British died hard and both groups were destroyed.
ABOVE:Lord's, Champions and Hearthguards do battle.
Now the two Lords Hearthguards clashed on the edge of the Village. Yet again another see-sawing stoush but ultimately The British lord triumphed. Only the Saxon Lord, his Champion and one of his hearthguard managed to escape.
At this point the Saxons called it a day and headed back to their boats.
BELOW:The situation at the end of the game.
Though not a success, the saxon Lord still has sufficiant funds to share some spoils and has been declared a 'Warlord'!
The next encounter will not be a raid, but rather a Battle for a chunk of British land.
Comments Welcomed.

Seymourium: A Dux Britianiarum AAR

$
0
0
ABOVE:The Saxon host on the field of battle!
Hi Guys
Stan and I followed up out last game of Dux Britianiarum (DuxBrit) with a pitch battle.
Read on:
The sun shone brightly. A light morning mist was quickly burnt off. Osic the Victorious looked across the field and could see the 'Romans' forming for battle. The Saxon host was tired from the march from the beach, and the voyage across the channel had been rather unpleasant.

 ABOVEChampions go forth to do battle
Osic the Victorious called his Champion Olag forward.
"Olag,.. we need to lift the men's spirits. Put on a show for them and dispatch that Roman dog"!
Osic pointed the a well armed Warrior who stood before the Roman line.
"One dead Roman coming up,..".
And with that Olag dashed up the hill to confront the enemy champion,.. and then promptly dashed back. The duel wasn't going the big Saxon lugs way, so he was recalled.
"I guess an inspiring speech will have to suffice" grumbled Osic.
After a rousing speech the Saxons soon forgot about Olag's flight. Moral was raised (8 on the Moral Chart).
The Romano British commander did better however and not only did the 'Romans' spirits rise (8 also), but an extra FATE Card was added to their hand.
(I had 5 cards, and Stan had 6).

"It seems the Romans intend to fight this battle sitting on their arses".
Osic observed the enemy had anchored a flank on a wood and their other flank on the edge of a ravine (that's the table edge to you).
"Best we move them off their arses then". Growled Votigen, Osic's second in command.
BELOW: The Romano British position as seen from their rear. The Saxon host can be seen in the distance.

ABOVE and BELOW:Romano British (Above) and Saxon hosts (below)
The Saxons moved the bulk of their troops (three groups of 'Warriors') off to their left behind the hill. Their plan was to fall in one devastating charge on the Levies on the Romano British right flank. As this was happening the Hearthguard (two groups of 'Elites') would move towards the woods hoping to draw the 'Roman' elites or at least some warriors away from the Levies.
ABOVE and BELOW: The Saxon warriors move off to threaten the enemy levies while the Hearthguard advance on the woods. The Saxon skirmishers (4 archers) move off to start sniping away from the vicinity of the hill.
Things went badly for the Saxons initially. The Roman archers in the wood managed to kill two of the hearthguard as soon as the moved forward and when the hearthguard did charge they pulled up just short of contact. They did however draw the Romano British Elites and a group of warriors into the woods.

That was the que for Osic and Vortigen to unleash the Warriors on the Levy Shieldwall.
As can be seen, the run of cards I had was pretty good, and I had high hopes that after a round or two I'd blow right through the levies!
BELOW:The cards I played for the big assault.

But expectations were soon dashed, and the Romans gave as good as they got. After two rounds of combat the Saxon warriors pulled back. At least a smal group of the Saxon hearthguard had managed to catch the enemy archers in the woods and routed them from the field.
BELOW:Despite the run of cards, the Romano British levies held on. I sustained 9 dead and 4 'SHOCK'. 7 'SHOCK' on the levies and a small group of warriors and 8 dead total for them.
At this point bot armies took 'a breather'. The Saxons continued to pepper the levies with arrows, killing 2 or 3 more and adding 'SHOCK' which the Romano British leaders spent their time removing.
Frustrated Osic decided on a gamble:
"Vortigen! Take the warriors and try and get behind these Roman dogs! I'll hold my Hearthguard here with the archers and keep them busy. NOW GO"!
With that the Saxon warriors moved off and Osic preparde for another attack on the levies.
BELOW: The situation after the first charge!
BELOW:The Saxon Warriors move in behind the enemy. The Romano British 'Elites' can be seen in the woods.
The Romano British attempted to prevent the movement of the Saxon warriors with a charge out of the woods, but it was somewhat uncoordinated and was beaten back.
The situation was now ripe for another carge by the Saxons.
BELOW:The Romano British are caught in a vice. Is this the end for them?
Osic's Hearthguard crashed into the levies and much slaughter was witnessed. Soon the levies threw down their shields are ran.
The Romano British Warriors and Elites were made of sterner stuff however, and despite their casuatlies were busy doing slaughter of their own on the Saxon warriors. Vortigen was last seen swiging madly with his sword at the best of the Romano British.
Osic took one last slash with his mighty blad at the Roman priest nearby who quickly fled the field before he ordered the remnants of his host back to their boats and Germany.
BELOW:The situation just at the end of the game.

In conclussion another great game. The terrain was a a real bugger, but credit must go to Stan for a battle well fought.
Highlits were the death of two hearthguard from the plucky Romano British archers and the brawl between the Levies and my Warriors.

All the Saxons are a mix of EUREKA Miniatures and Foundy Miniatures, except for my archers which are RENAGADE MINIATURES 'Guals'. I now have some EUREKA MINIATURES Archers that I'll paint up soon.
Stans Romano- Brits are a mix of EUREKA, ESSEX, BTD, Gripping Beast and Old Glory Miniatures.
As usual, your comments are welcomed

For Inspection!

$
0
0

 ABOVE and BELOW: A painted example of the magnificent guillotine set that EUREKA MINIATURES has produced including 'The Angry Mob
Hi All
Well Christmas has come and gone, but not before I popped down to EUREKA MINIATURES to spend some of my Christmas budget on some lead to add to the pile.
There was some real treats to sample, so I thought I might take the opportunity to post a few photos and do some quick reviews of what I picked up.
First off lets have a look at one of the new additions to the AB MINIATURES range. This time Dutch Carabiniers of the 100 Day or Waterloo campaign of 1815.
As usual these are magnificent sculpts by Mr A Barton, and you will find as much detail on the 18mm minis as you would expect to find on the best 28mm miniatures out there. Very little flash, and they cleaned up very quickly. The poses are excellent, being available as either charging or with swords resting drawn but at the shoulder. I purchased 12 of these chaps, and together with the Belgian Carabiniers will make up my heavy cavalry for my Prince of Orange's Corps for LASALLE or FOG-N.

Moving on to the 28mm stuff I purchased.
As usual there was just too much to chose from. Visiting Nic's shop is always fraught with financial doom, and I spent much more than I intended.

ABOVEAB MINIATURES DUTCH CARABINIERS.

I couldn't resist this little gem:


As you can see it's a lovely little sculpt of a pretty young lady stepping out of a bath tub. You actually get a bath tub just for the little lady or one with ummm, some chap with a hat. You could easily paint up both, and she could comfortable transition from one tub to the other without any trouble fitting snugly in both. I can see her being the subject of many a 'rescue' playing a skirmish game of either Sharp PracticeSong of Drums and Shakos or Terrible Sharp Sword. She is a delightful miniature. Very feminine and with a very pretty face. Posed in the process of wrapping a towel around herself.

Now, I needed 4 'Saxon Archers' to complete my Dux Brit army, and Nic had these chaps available. Perfect I think and full of character. Sculpting and poses are excellent. Almost no flash to speak of.
The highlight of my visit however must be the magnificent guillotine set that EUREKA MINIATURES has produced.
UPDATE: I've headed this post with a painted example that Nic was showing off at CANCON 2013. Please note! I DID NOT PAINT THIS SET. This set was on display at the EUREKA MINIATURES stand at CANCON. I believe Kosta Heristanidis painted this particular set.
This is a BIG set. It comes complete with 21 Miniatures, (counting the 'Father and Son' combo and 'Two Headless Victims' together as 4 miniatures) and the guillotine itself. You also get a basket and some heads (which I somehow didn't collect). Nic, if you read this I'll need to pick up the heads. A guillotine without a bunch of heads is like Hotcakes without syrup
 ABOVE:A great day out for the whole family.
 ABOVE:Step right up, everyone's a winner. You're sure to get ahead,.. get it? GET A HEAD! Boom Boom; I'm here all revolution. Try the veal.
 ABOVE:The next vitim for the razor. "Here my lady, let me trim your locks".
BELOW:Ya Boooo Hissss! Anyone want a ripe apple of some stale bread?
 The sculpting of these miniatures is as good as any I've ever seen. the facial expressions are excellent and posing brilliant. I love the chap inviting a victim to climb the stares to the blade, and the'rowdy crowd' really do look the part. I'll base the miniatures individually, as the soldiers will have additional use as sentries in any number of games, and the prisoners will need rescuing not only from the guillotine but also Spanish Bandits or Russian Cossacks, (to name but a couple).
 ABOVE and BELOW: The Army is present to lend a hand and maintain order.
 BELOW:"OFF WITH 'Er HEAD"!! a view of the victim and her 'assistant' from a different angle.
 BELOW:The guillotine.
The actual guillotine itself is a very nice model, and fits together quite neatly. There was very little flash to speak of, and assembly is rather straight forward. I've pictured mine with the support post assembled separate to the actual 'stage', but you should get the idea.

 BELOW:A empty basket. Soon to be rectified.
 I understand that EUREKA MINIATURES will also be producing a cart (with extra 'victims"?) to compliment the guillotine set.
I also picked up a couple of Comic Like Lace War miniatures (see below).
Why?
Why not.
Just the thing for an Imagi-Nation. I only purchased two, but I'm thinking of increasing them to a unit of 16 and building a Battalion of the silly chaps.
 Finally I thought I'd take to opportunity to compare side by side EUREKA Miniatures Vivandiere set with WARLORD GAMES (WLG) offering.
Well, EUREKA's offering comes with a nice little cart and mule / donkey. WLG's comes with a donkey that is loaded with all manner of kit.
EUREKA's Lass stands rather casually with a barrel of Brandy or Rum, (who knows?) and wears a 'Bonnet Police' on her pretty head. She has a rather pleasant face and looks like she is waiting 'in the rear with the gear'.
As for WLGs gal. Well the model comes with two heads and two arms for you to choose from; one carrying a bottle of brandy and the other a pistol.  She's in full flight, dashing off to lift the troop's spirits. I've gone with the bottle of booze rather than the pistol. Both are nice models and I'm not sure which I prefer at this point. I feel EUREKA's looks 'prettier' but I do like the WLG donkey. Good news is they do compliment each other quite well, and I plan to have them working as some kind of 'front line supermarket', with the EUREKA Lass holding the fort as the WLG girl goes dashing off to be of some ummm,.. assistance.
Once painted I'll be able to make a call on which one I prefer.
Anyway, that' enough for now.
I did also pick up a 'Surgical Strike' team for modern gaming, and some Jazz band members and some 1920's style 'Charleston' dancers'.  I just know some gangsters (or Zombies) will spoil the dance!!
Cheers for now.
Comments Welcomed!!!

SAGA AAR. Byzantines V Anglo Danes.

$
0
0
 Hi Guys
A very relaxed New Years Eve here at 'Trailape's Gun Park'. Stan popped around after skiving off from domestic duties to have a game of SAGA with me. I've never played the game before, so I quickly based up some Byzantines and took to the 'field of Honour' to face Stan's Anglo Danes.
I'd had a glance through the rules previously but I would rely on Stan to get me started.
I decided on a Warband consisting of a Warlord / Strategos (derrrr), one Mounted 'Hearthguard' (called Kavallaroi) and 3 units of 'Warriors' (one armed with bows called Toxotai and two armed with spear and shield called Kontaratoi).
Stan's Warband consisted of a Warlord, two Hearthguards and two Warrior units.
Terrain consisted of a 'Large Building' (a Roman Villa) and a hill.
I deployed first.
My plan was rather simple, ('cause simple is good). I'd pepper him with arrows and send my Kavallaroi off on a sweeping flanking attack with the Warlord. I figured the KONTOS Saga Ability could be a game winner for me, so I wanted to get my Kavallaroi. The photos below follow the game:
BELOW: Stan's deployment.From left to right: Warriors, Hearthguard, Warlord, Warriors, Hearthguard.
 BELOW: Ready for action my Warband form with my 'Warriors' in a nice neat line, with the archers in the center and a spear armed unit on the hill.
 BELOW: My turn 1. I advance my warriors, with the Toxotai slightly back. I wasn't keen for them to get into any 'Hand to hand' combat.  My Kavallaroi move off to envelopment Stan's right flank. My Strategos changes into his battle dress. :)
 BELOW: My Archers open fire and simply annoy the Hearthguard ('sigh'). My BLUE Kontaratoi attack their opposite numbers and despite the lack of spears, (I'm painting them) flog the Anglo Danes. Stan's dice rolling was horrible (for him).


 BELOW: Stan then throws his Hearthguard into the fight. My BLUE Kontaratoi are reduced to one brave soul, but the enemy Warriors are reduced to two and the Hearthguard are also down to two!
 Meanwhile I unleash the Kavallaroi with the Strategos and adding the 'KONTOS' Saga Ability slaughter the Anglo Dane Hearthguard on the right flank for the loss of not one Kavallaroi trooper.
BELOW: The situation at about turn 3 or 4.


BELOW: Stan feels a tad isolated.
  Stan pulls a clever move, and double moves his warriors in front of the hill to attack my Kavallaroi and rescue his Warlord. I reserve half my dice in defence. Consequently I only lose one Kavallaroi trooper.
 ABOVE: Meanwhile my Archers / Toxotai finish of the two Warriors and then start firing at his two left flank Hearthguard.
BELOW: My Kavallaroi disengage and move back towards the villa. My Stategos moves around to support my Infantry.
 BELOW: Stan now turns on the Unit of Kontaratoi that have moved off the hill,...
... and kills quite a few of them. (See BELOW)
However, time is against Stan and his Anglo Danes and the game ends. It'll be decided on points.
A quick tally and we conclude the Byzantines win 14-7.
So what do I think of SAGA now I've played a game?
Well I must say I'm a fan. They system is elegant and challenging.
I like the tactical challenge of matching the dice to the battleboard to get maximum effect from your troops and I like the fact you can hold dice in melee back to use purely defensively.
Each 'Faction' or different warband has it's on particular strengths and weakness, and there is a challenge in simply playing to those strengths and weaknesses.
But ultimately it's about having fun, and SAGA is certainly fun.
I really enjoyed playing with the Byzantines.
My eldest daughter recently purchased me enough PERRY MINIATURES Normans (Early Crusaders) and now I'm motivated more than ever to get them painted and based. I can see them clashing with these Byzantines.
Comments welcomed.
Cheers and HAPPY 2013!


What to do in 2013?

$
0
0
Hi Guys
I thought I'd jot down what I wish to achieve in 2013:
1. Finally finish my 28mm 1812 -15 Prussians! Most of this army is CALPE miniatures and they are fantasic miniatures. I started painting some of these recently and I must say the are my favorite 28mm miniatures. They almost paint themselves.
2. Complete my ACW armies and start playing Sam Mustafa's 'LONGSTREET'. If this system is as good as Sam's games, MAURICE and LASALLE then 2013 should be a cracking good year.
3. Play at least a few games of SHARP PRACTICE and IABSM (games by the TOO FAT LARDIES).
4. Complete my SAGA Warbands. Normans, and Anglo Danes at this point. Maybe Viking also.
5. Finish building my 28mm Dutch Belgians and Nassau Army for the 100 Days LASALLE campaign.
6. At least get a start on my 28mm 1813 Russians.
7. Finish off my 28mm Trojans. Not sure what rules I want to use with these guys. I'm thinking of some type of modification to the TFL's DUX BRITAINNIARUM but who knows? What ever rule system I use their needs to be some mechanisim that allows for 'Heroic' actions.
8. Paint up some more 15mm Ancients.
9. Finish of my 18mm Dutch Belgians and Bruswickers for the 100 Days
10. Complete my AWI armies in 28mm!
I think that's enough. Certainly ambitious enough.
But what is a post without some pictures?
So here is three photos of some Bavarian and Wurtemburg soldiers that I asked my good buddy Gunner Dunbar to paint for me. These are 'modified'AB miniatures. The Bavarian Guard Grenadiers are Bavarian Line infantry with French Grenadier heads. Not wanting to waste a miniature I then asked Danl to place the Bavarian heads on the now 'headless' French Grenadier torsos in Greatcoats. Consequently I have two rather unique units of Bavarian infantry.
BELOW: Bavarian Guard Grenadiers and a Bavarian Line Regiment in Greatcoats


The other unit is Wurtemburg Guard Light Infantry, (see BELOW). These are simply, (I say simply) with 'green-stuff' epaulettes. Again, another unique unit.
As you can see, the basing isn't complete. I need to flock them, but I just wanted to put them out there.
Well that's all for now.
Comments welcomed and HAPPY 2013. Here's hoping your 2013 is better than 2012.

The Battle of Lambsnag on Bunn. A FoG-N AAR

$
0
0
NORTH
WESTEAST
SOUTH
ABOVE:Just as the sun rises and the morning fog lifts, the French army converges on the town of Lambsnag on the river Bunn.
Hi All
Stan and I recently invited our good mate Arnaud up from the 'Big Smoke' of Melbourne to join us for a game of Field Of Glory - Napoleonic. I quickly designed a scenario based 'loosely' on the battle of Albuera. I don't have many Spanish and Portuguese miniatures, so decided on a 'German' setting. The combatants would consist on one side, (commanded by Arnaud) French with some Polish troops and the other side consisting of a mix of  Bavarians and Wurtembergers and British.
The idea is as follows:
It's 1814, and even though the Bavarians and Wurttembergers have defected to the Allies, Napoleon has managed to withdraw from the Battle of Leipzig in good shape. The Allies have brought across from the Low Countries a British Corp to aid their new found allies, (the Bavarians and Wurttembergers). A mixed force of these 'Germans' are now defending the strategically important town of Lambsnag on Bunn. Marshal Victor has been directed by the Emperor to capture the town and the vital bridges and road intersections. Sir General Thomas Graham is commanding the the British Army (of Corps size) and he is hurrying to the aid of the newly raised Bavarian and Wurttembeg units.
The Emperor had intelligence that the town is defended by the recently defecting Bavarians, and suspected that even though they had fought hard against him at Hanau that here (without any Austrians to intimidate them) they might surrender the town.
The battlefield was dominated by the river Bunn running across it. On the eastern side of the river was the town of Lambsnag. A long line of hills ran the length of the eastern side of the Bunn. Further east and behind the hill line lay a small stream; the Dinneroll which ran between the hill line and the Kornchip Heights
Some Scenario Notes:
Here is the Map:
A: French deployment are for French Infantry Divisions.
B: French deployment are for French Cavalry Divisions.
C: Entry point for British Divisions.


The French divisions in Deployment area 'A' setup just outside Musket range, (that's 6 BW in FoG-N terms).
The French player can deploy his troops in any way he sees fit within the deployment areas.
The Bavarians start with the Vanguard Division with one unit in Lambsburg and one unit to the south in any formation he wants. 
The Bavarian Guard Division must be deployed to the north of the towm. 
The German Cavalry Division starts on the Kornchip Heights.
Terrain Notes:
The town of Lambsnag can hold either one LARGE unit or two SMALL units.
For game purposes all the hills are gentle slopes. The River Bunn will cause all troops types to halt as soon as they contact it, but they may then cross it at no penalty. 
The small Dinneroll stream is clear terrain for movement, but does offer some aid in defence.

The mechanism for the arrival of the British is as follows:
A roll of 5 or 6 on a D6 is required for each British division per turn. If the roll is unsuccessful then next turn TWO divisions arrive on a 5 or 6. If that roll fails then THREE divisions arrive on a roll of a 5 -6. I think you can see the pattern here.
If (in the unlikely event NO Brits have arrived by turn three) then they will ALL arrive on turn 4 in any Order of March the Allied Player wishes. Otherwise the Allies contine to roll for reinforcements every turn.

I will refer to the Allied units as Regiments and the French units as Brigades.
Now I've set the scenario in Germany in 1814 with French fighting Bavarians and British, but you could easily use Austrian in 1809 or whatever. Use your imagination, I did.

BELOW: As the morning fog lifts, the Bavarians are confronted with the French army just outside musket range.
The French ORBAT was as follows:
FRENCH and Polish
Troop Type
Name
Size
Elan
Training
1st Corps

CC2 (Skilled)
Victor
1st Division
DC1 (Competent)
Girard
Small
Average
Drilled
Light Infantry
French Light Infantry
Small
Average
Veteran
Line Infantry (reformed)
French Line Infantry (Skirm)
Small
Average
Drilled
Medium Foot Artillery
French 8 pndr Foot Artillery
Small
Average
Drilled
2nd Division
DC2 (Skilled)
Gazan
Light Infantry
French Light Infantry
Small
Average
Drilled
Line Infantry (reformed)
French Line Infantry (Skirm)
Large
Average
Drilled
Medium Foot Artillery
French 8 pndr Foot Artillery
Small
Average
Drilled
3rd Division
DC1 (Competent)
Godinot
Line Infantry (reformed)
French Line Infantry (Skirm)
Large
Average
Drilled
Line Infantry (reformed)
French Line Infantry
Large
Average
Drilled
Line Infantry (reformed)
1st Swiss Line Infantry
Small
Superior
Veteran
Medium Foot Artillery
French 8 pndr Foot Artillery
Small
Average
Drilled
Polish Division
DC1 (Competent)
Dombronski
Line Infantry (reformed)
Duchy of Warsaw Inf (Med Arty)
Large
Average
Veteran
Line Infantry (reformed)
Irish Legion Infantry
Small
Average
Veteran
Dragoon Division
DC1 (Competent)
Latour-Mabourg
Heavy Cavalry
French Dragoons
Small
Average
Veteran
Heavy Cavalry
French Dragoons
Small
Average
Veteran
Light Cavalry (Lancers)
Polish Lancers
Small
Average
Veteran
Horse Artillery
Polish Horse Artillery
Small
Average
Veteran
Light Cavalry Division
DC1 (Competent)
Briche
Light Cavalry
French Chasseurs
Small
Average
Drilled
Horse Artillery
Westphalia Horse Artillery
Small
Average
Drilled


The Allies ORBAT was as follows:
ALLIES  
Troop Type
Name
Size
Elan
Training
CC2 (Skilled)
Graham
2nd Division
DC1 (Competent)
Stewart
Line Infantry (reformed)
British Line (Skirm)
Small
Average
Drilled
Line Infantry (reformed)
British Line
Small
Average
Drilled
Line Infantry (reformed)
British Line (Skirm)
Large
Average
Veteran
4th Division
DC1 (Competent)
Cole
Line Infantry (reformed)
British Line (Skirm)
Small
Average
Veteran
Line Infantry (reformed)
British Line
Large
Average
Drilled
Medium Foot Artillery
British RA 9pndrs
Small
Average
Drilled
5th Division
DC1 (Competent)
Hamilton
Light Infantry
British Lights
Small
Average
Drilled
Light Infantry
Small
Average
Drilled
Line Infantry (reformed)
British Line (Skirm)
Large
Average
Drilled
Light Cavalry
Light  Dragoons
Small
Average
Drilled
Medium Foot Artillery
British RA 6pndrs
Small
Average
Drilled
Cavalry Division
DC2 (Skilled)
Merchant
Impetuous Shock Heavy Cavalry
British Heavy Dragoons
Small
Average
Veteran
Horse Artillery
British Royal Horse Artillery
Small
Average
Drilled
CC1 (Competent)
Beckers
Vanguard Division
DC1 (Competent)
Pappenheim
Light Infantry
1st Bavarian Light Inf
Large
Average
Drilled
Line Infantry (reformed)
11th Bavarian Line Inf
Large
Poor
Drilled
Guard Division
DC1 (Competent)
Holler
Line Infantry (reformed)
Bavarian Guard Inf (Skirm)
Small
Average
Drilled
Line Infantry (reformed)
Württ Guard Inf (Skirm)
Small
Average
Drilled
Line  Infantry (reformed)
12th Bavarian Reserve Inf
Small
Poor
Conscript
German Cavalry Division
DC1 (Competent)
Dietz
Light Cavalry
Wurttemberg Chevaulegers
Small
Poor
Drilled
Heavy Cavalry
Bavarian Dragoons
Small
Average
Conscript


THE GAME
Turn one. As can be seen from the photos above the allies start with the Bavarian 11th Line Infantry in the town of Lambsnag and the 1st Light infantry to the south of the town. The German Guard Division was deployed on the Hill line to the north of the town. The German cavalry was still asleep in their camp on the Kornchip Heights.
The French were converging on the town under the cover of an early morning fog. As the mist lifted the French were almost withing musketry range. The Masses of French and Polish cavalry were coming down from the north.
The battle opened with the Allies testing to see if any of the British would arrive on turn one.
Good news (a 6 is rolled), Stewart's 2nd Division was marching west on the Lambsnag - Hanau road and were already on the Kornchip Heights.


BELOW:The Bavarian Guard Grenadiers. Average Drilled Line infantry. Nothing special. They have an attachment of Wurttemberg Light Infantry Skirmishers. Newly raised, they won't get the 'Guard' bonus.
BELOW:Wurttemberg Guard Light Infantry. Again, newly raised, we've classed them as Average Drilled LINE infantry with a Skirmisher attachment.
BELOW: Bavarian Reserves. 'Poor Conscripts' LINE infantry.
BELOW:The British 2nd Division arrive just as the German Cavalry division is tumbling out of bed and onto their horses.
The French for their part didn't waste any time and launched an immediate assault on Lambsnag with a Brigade from the 3rd Division.
Try as they might the French could not budge the Bavarians from the town. Victor decided to focus on clearing the southern flank and drove off the large Bavarian Light infantry Regiment away with a massive weight of fire.
ABOVE and BELOWA fire fight erupts!
Whilst the fire fight continued around Lambsnag, the masses of French and Polish cavalry moved to envelope the north of the town. The German cavalry moved off to confront them.

BELOW:The French and Polish cavalry heading north before sweeping towards the Allies northern flank.
BELOW: The Bavarian Light Infantry withdraw (wavering) from the flank of the town.
Turn two, and the Allies rolled to see if more of the British will arrive. Another 6!
Now the British 4th Division under Cole arrives. As they arrive the British 2nd division, (two regiments of Highlanders and a regiment of English Line infantry) move of Kornchip Heights to support the Bavarians in the town. Just in time also, as they are able to provide some 'rear Support' for the town's defenders, and provide some refuge for the retreating Bavarian light infantry.
BELOW: The British 2nd Div moves down off Kornchip Heights as Cole's 4th Division arrives.
BELOW:The Bavarian 11th Infantry Regiment defends Lambsnag as French infantry swarm across the Bunn River to the south of the town.
Turn three. No British arrive this turn (a 3 is rolled).
Again and again the French launch attacks on Lambsnag without any success. As two French Brigades attack from the western side one brigade manages to attack from the northern side.
This only invites the Bavarian Guard Grenadiers to enter the fray however, and the charge down the hill and into the flank of the French brigade. After a short fight the French brigade breaks and routs back across the Bunn.
The French have more success on the south of the town however and those units from the 1st and 2nd Divisions that have crossed the Bunn engage the British 2nd Division units in a fire fight.
The result of which will see the small Highlander Regiment driven back 'Wavering' and the English Regiment is disordered.
The French are in a firm position on the high ground to the south of Lambsnag now. Now Victor looks north.

BELOW:Hot lead and round shot crash into the town, disordering the Bavarians within.
At the top of the picture you can see the large French brigade crossing the Bunn . They then asaulted the town from the north.
BELOW:Polish Lancers and French Dragoons eye the German cavalry across the Bunn river.
BELOW:The Bavarian Guard Grenadiers moments before they chrged down the hill into the exposed flank of the French attacking Lambsnag from the north.
Turn Four. Again, no British arrived this turn (a 1 rolled).
Victor was now getting frustrated with the failed attacks on Lambsnag. He sends an ADC of to order the French and Polish cavalry to attack the German horsemen across the Bunn. At the same time he ordered the Polish, Irish and Swiss Infantry to do what the French seemed incapable of, and that is to drive off some Bavarian and Wurttemberg infantry.
"Those fellows on the hills will do. They don't have any stout stone walls to hide behind"!
With that the Swiss crashed into the Bavarian Guard Grenadiers now downhill after driving off a large French brigade. At the same time the Polish infantry attacked uphill into the Bavarian Reserve infantry and the Irish also charged uphill into the Wurttemburg Guard Light infantry.
The Reservists were already 'wavering' from the fire from the Poles, and they were soon destroyed.
The Swiss and Irish were also victorious, breaking their opposite numbers.
The success didn't end there. The French and Polish cavalry smashed the German cavalry. Not at all surprising being more numerous to the score of 2 to 1, having disordered half the enemy cavalry with supporting fire from their horse artillery and finally being of better quality and 'Elan'!
They German cavalry did manage however to kill General Birche, commander of the French Chasseurs a Chevals brigade.
BELOW: The results of the cavalry battle. All the German cavalry routed from the field.
BELOW: The situation at the end of turn four. The French secure the high ground to the north and south of Lambsnag. The town is still held and a large regiment of Highlanders still provide support, however the allies are very battered with three Regiments of foot broken and two regiments of cavalry routed from the field.
Turn Five: Still no reinforcements for the Allies. The Bavarian Guard Grenadiers rally, (now spent and 'wavering') but the Wurttemberg Guard Lights disperse and a lost for this battle. The turn is spent reorganizing a defence on Kornchip Heights. The French for their part manage to drive off the wavering Highlanders leaving the sole 'Large' Regiment of Scots behind Lambsnag. They also launch yet another assault on the town and again, the attackers, (the Swiss this time) are beaten back. 
 ABOVE:The 'Small' Highland regiment (waving) catches more hot lead. The result sees them retiring quickly up the Kornchip Heights.
BELOW: The French and Polish cavalry advance towards Kornchip Heights. The Irish Infantry link up with their mounted brothers.

 ABOVE: The Bavarian Grenadiers rally after crossing the Dinneroll.
BELOW:The Swiss assault Lambsnag.
Turn Six: HUZZAH!!! A 5 is rolled. More British arrive. This time it's the 5th Division.
The Allies are still holding on grimly but it's looking bad. The French are closing in on three sides. The Allies are pushed back to the foot of the Kornchip Heights. The British 2nd division to the south of Lambsnag are looking particularly vulnerable. All along the battlefield fire fights rage. Finally the Bavarian's in Lambsnag can't take any more punishment and are broken by the massive weight of fire that is brought down on them. 
 ABOVE and BELOW: The Bavarian 11th Regt is finally driven from Lambsnag.
Now the French make what they hope is one last push. The Swiss move into the now vacant Lambsnag. The three French Infantry to the south hurl themselves on the Bavarian Light infantry and the Small English Regiment on their flank. It's 3 V 2 and all are 'disordered' except one of the French Brigades. The fire from the Bavarians and English scores a hit on each on some of the French but they all charge home. The hand to hand combat results in one French Brigade reduced to wavering, but both of the Allied Regiments are routed.
The French also launched their cavalry up the Kornchip Height at the British positions there, but it was at this point the allies concede defeat and decided to withdraw as best they can from the Kornchip Heights.
 ABOVE and BELOW: The French Charge in and receive fire but not enough to stop them. The Allies are broken by the bayonet.
    Another very enjoyable game of FoG:N.
I really like these rules. The ebb and flow is well captured and their is plenty of 'Friction' to frustrate your plans.
As usual. Comments are welcomed.
Cheers


Some additional FOG:N observations.

$
0
0

Hi Guys
'Gman' recently asked some questions on a club forum about Field of Glory: Napoleonic (FoG:N) and what I thought of the system.
I thought I might share my response, (and that of my friend Arnaud 'LeGrognard' )


From "Gman"
Hi Scott,

I've heard it said that FoGN is a bit slow to get a game through, how do you find it compares ?

Here in Brisneyland we're looking at what rules set to focus on for Nappies and some of the popular choices are Napoleon at War, Waterloo (GW offshoot ?) and FoG:N .

Do you have any experience with the first two ?

Hoping that FoG:N is easier to pick up on and less brain hurty than FoG Ancients which is pretty much abandoned locally, although I'm not meaning to make pre-judgements at all (in case anyone else wonders !).

Genuinely trying to get an idea of pros and cons.

My reply:

Hi Gman
SLOW? No, defiantly not.
Napoleon At War and Waterloo.? I've Played Nap At War. It's a Division level game. At that level I prefer LASALLE.
Waterloo. Not played though I do have a copy. For what it's worth it looks to much like Warhammer for my liking.
FoG:N is 'wordy' but it rewards the effort put in with an excellent 'Napoleonic' gaming experience IMHO. That said, it's nowhere near as difficult to grasp as some systems I've dealt with. There is an EXCELLENT PowerPoint presentation that you can download that walks you through an entire turn. Highly recommended. I'll try and find it, but I think it's somewhere on theSlitherine FoG-N Forum.


From "LeGrognard"

Hi GMan, 
I posted this in another thread about "FoG:N First Impressions", but have pasted the salient points here: 
Having not played the rules in some months, it was very easy to pick up again, especially with a very knowledgeable referee to assist players (Crabby also has a lot more experience, so really I was the only neophyte).

Rules flow very well, and once you get the sequence down in your head, play moves along very swiftly.

By the end we had a pretty convincing conclusion which I've never seen with any other Corps level system. The only thing that really slowed us down was the occasional query regarding some of the nuances. Since it was a friendly game/learning experience we would all grab our rule book and carefully go through the applicable section so everyone understood. Helped with game play lots, but did slow us down a bit.

Biggest issue I have is with me...not the rules. At Corps level your considerations are far different than at battalion level (duh!) which is where most of us learned Napoleonic wargaming. Once you accept that, then everything about formations, fire, command and combat really does make sense.

The more I play, the more I appreciate these rules. They actually make sense, flow very well and are a joy to play. You can get a very convincing decision in a decent period of gaming once you know what you are doing.

I am certainly enthusiastic about them. Between these rules and "Lasalle" by Sam Mustafa I think I've got my Napoleonic gaming covered. Basing is the same for both systems as well as "BP" and "RtoE" so I can dabble there as well should I choose.

I pretty much agree with everything Arnaud has stated here. For the life of me I can't understand why these rules have not taken off with more people. I understand that they have not taken off in Sydney, but I believe them to be fairly popular here in Melbourne. It's a CORP level game. Once you grasp that it's all good. The rules play quickly.
I've some AARs on my blog:

Battle of Sacille 1809
http://trailape.blogspot.com.au/2012/10/moab-12-sacile-1809-fogn-style.html

Battle of Mockern 1813
http://trailape.blogspot.com.au/2012/07/mockern-october-1813-fog-n-aar.html

and of course our recent battle of Lambsnag on Bunn

http://trailape.blogspot.com.au/2013/01/the-battle-of-lambsnag-on-bunn-fog-n-aar.html

You can find other FoG:N stuff here:
http://trailape.blogspot.com.au/search/label/FOG-N


BELOW: Saxon Infanrty, 1812. "We LOVE FoG:N! (These comments are not paid for by Slitherine)".
I have played 3 VERY large battles with them thus far and got results in relatively short amounts of time (3.5 - 4.5 hours).
The game flows nicely and feels like a Corps level action.
As Arnaud said, between these and 'Lasalle' I've got my Nap gaming covered. I use SHARP PRACTICE for Skirmish and FPGA for ARMY level.

Another question was posed by 'Nick':

My only reservation now is that you and I share a love of AB figures but we seem very different in our approach to rules. You like LaSalle where I think they're a very disappointing set. I need a Command & Control system and a well developed Morale system and some differences between troops when firing (I dont believe Prussian Landwehr ever shot as well as the Old Guard) in my rules for any level of command.
Do these elements exist in FOGN in your opinion?

The C&C system in FoG-N is IMHO excellent. It's nothing like LASALLE in that regard,
(and nor should they). I'm a Divisional Commander in LASALLE. Here in FoG:N I'm commanding a Corp as a minimum.
Shooting? The big difference is between reformed (think French, later war Prussians, etc) and Un-Reformed (think 1806 Prussians). Troop TRAINING has some bearing on shooting. For example:
VETERANS and CONSCRIPTS have re-rolls. Vets re-roll 1s (a Miss) and Conscripts re-roll 6s (a Hit).
Also 'OLD GUARD' will endure hits better than Landwehr.
Remember we have entire REGIMENTS (Brigades) shooting at each other here, not a Battalion of Guard Grenadiers exchanging shots with Landwehr. Things like attachments of Skirmishers and Artillery will impact on your ability to shoot.

In short, I believe so.
FoG:N is NOT FoG:A.

Cheers
Comments Welcomed.

SAGA AAR. Anglo Danes defend their Village

$
0
0
 Hi Guys
Another SAGA AAR.
Tonight daughter number 3 (14 years old Hayley) and I had a SAGA battle. Anglo Danes under her command defending a village against Byzantines commanded by yours truly.
My warband consisted of 5 Warriors (two of which have bows, three have spear and shield) and a mounted Hearthguard (Kavallaroi) and finally a mounted Warlord (Strategos).
Hayley was defending with four units, 2 Hearthguard and 2 Warriors and a Warlord.
The scenario dictates I have 6 moves to capture the village. I assume after six move the enemies standing army arrives and my lads must dash off back to their boats or whatever,...
BELOW: DEPLOYMENT


The battle opened with a flurry of arrow shots at the Anglo Dane Hearthguard positioned in the center. Immediate success with two warriors falling to my hail of arrows.
I attacked with the Warriors on both ends of my line and sent my Kavallaroi ff to my left to attempt to attack Hayley's right flank. Hayley countered by moving one of her two Hearthguard off to her right to stall my  Kavallaroi.

The battle between the warriors resulted in much slaughter, but my lads came off worse for wear.
Frustrated with my lack of success with my warriors, (despite so much advantage with fire support from my Warrior Archers) I moved my Strategos off to join the Kavallaroi in an attack on the Anglo Dane Hearthguard on Hayley's right.

The next three turns saw my Kavallaroi bouncing off these Anglo Danes on the flank. At one point I actually feared for my Strategos life!
Hayley's Warlord by contrast was almost single handily frustrating all my efforts to destroy his Warband.
By the time the last turn came around Hayley was reduced to a single Hearthguard and her wounded Warlord in front of the village.
My Strategos and two remaining Kavallaroi were still being faced down by three very annoyed Hearthguard near the low stone walled field on her right flank 'sigh'.
Unable to actually reached the village my only option was to shoot down the Warlord and Hearthguard defending it.
I shot at the Warlord first and he fell beneath the rain of arrows. The Hearthguard however hunkered down behind his shield and survived.
6 turns down, and Hayley held on grimly to score a victory.
With the imminent arrival of the Anglo Dane relief force my warband withdrew.

Another enjoyable game of SAGA.
As usual comments are welcomed.
Cheers.

Westfalia Miniatures Review

$
0
0
Hi Guys
I recently placed an order with the guys at Westfalia Miniatures. I ordered some Rude Highlanders, (a pair of miniature), a set of eight Hanovarian Kiemannsegges Jaegers, a set of three French Engineers in body armour and a set of four Prussian Medical staff.
Lets have a look at the Highlanders first I think:
 They are called 'Rude' Highlanders and they certainly are that. Both miniatures are sculpted in the act of taunting their French enemies with uplifted kilts. The miniatures are excellent sculptures. There is plenty of detail and the posing is excellent. They really appear to taunting their opponents in the time honoured fashion we have come to expect from the Scots. The uniforms are historically accurate  and if something is not how is should be I'm not aware of what could be missing. I'm really impressed with the detail in the faces of these lads. They are clearly having fun. If I had one criticism it's that the Scot on the left hasn't got a musket. A loose musket that could be placed at his feet or resting against a fence post or wall would have been a nice touch but I'm really just being picky now. Overall these two lads a a must for any serious (or not so serious) collector of a Napoleonic war British army. There was no flash on the miniatures at all. What you see here is exactly as I received them out of the pack. For 3 GBP I think they are very good value for money, (after all, it's not like you will need an entire battalion of these guys).


 They are certainly compatible with Perry Miniatures (my prefered manufacturer of Napoleonic Brits).
How you pose / base them is umm up to you.

 The 3 French Engineers / Sappers are real gems. They consist of one fellow swinging a pick, one creeping forward with some tools and the third, (not pictured sorry) firing his musket, (probably covering his two comrades as they work). These are unusual (but welcomed) miniatures sculpted in the process of doing what engineers / sappers do.  They have helmets and body armour on (a 'must have') if sapping or doing other engineering tasks close to the enemy lines or fortifications. Again the detail is excellent and there was no flash to speak of. At 4.50 GBP they are good value for money. I'm sure you can think of plenty of 'Skirmish' type actions where these guys would be very useful. I'll be basing them for SHARP PRACTICE.

Let's now look at the Hanovarians.
There are eight miniatures in this set, consisting of an Officer, Hornist, one Sharpshooter, (the chap with the fancy epaulette on the right shoulder) and five Jaegers either shooting, dashing forward or loading.
Sculpting and posing is first class. All thedetail is there, and these chaps, like the others, look as if they will paint up a treat.
The subjects are a rather obscure unit, and I'm not sure if any other manufacturer is producing them. 12 GBP for these eigth miniature is I think good value. You'll only need one packet of these lads, and eight is a good number for a skirmish unit. Again, I'm think of SHARP PRACTICE for these guys.
Again, as you can see no flash to speak of.
The Officer (Captain) is a very serious and grim faced chap. He means business.
You can find details on this unit during the '100 Days'HERE


You get four miniatures. A Battalion Surgeon, two Company Surgeons and (I think) a 'Squadron' Surgeon.
Again, sculpting, posing and detail is excellent. The uses for these miniatures is limited only by your imagination, but casualty markers immediately springs to my mind. I particularly like the kneeling chap. He has a sword at his feet, (just the thing for defending himself and his patient). The Surgeon with the apron and saw in hand would look nice in a little diorama at the rear of your army.
Priced at 6 GBP they a good value for money in my humble opinion. 

 I suspect the Doctor with the Bicorn hat on the right here could be painted as a British Surgeon.

All these miniature are very robust. The French Sapper with the pick was of concern, as the pick handle is rather thin, but I was able to bend the pick without fear of it snapping.
All these miniature have real character. They are amoungst some of the best sculpted miniatures I've seen.

Finally I was also sent a French Ammunition wagon \ Cassion. You can see an assembled version at the Westfalian Miniatures website HERE
Assembly is very straight forward and all the parts fit together without any dramas.
This will look the biz indeed as part of my Gun Park directly behind a batter of cannon.
PRICE at time of this review: 8 GBP.

In Summary I would HIGHLY recommend Westfalia Miniatures to you for excellent quality miniatures.
They are certainly a producer of quality miniatures offering those 'unique' miniatures you probably will struggle to find anywhere else, but will add that vital bit of 'character' to your army.
Comments welcomed.
Cheers

PERRY SWISS: Ready For Action.

$
0
0
 Hi Guys
Well, you may recall I was working on some Swiss Infantry for my Napoleonic French Army in 28mm.
These guys here are all PERRY Plastics.
Well, I've finally finished basing them and my first Battalion is ready to go.
I have given them a Colour (Flag) from a French Line Regiment, so I will have to replace that with the appropriate "Swiss' color eventually but for now I hope no one will notice.
These chaps are painted as the 4th Regiment.
I've based them 50mm wide x 40mm deep. This is my preferred base size for Infantry.
The Perry Plastic Infantry are very nice sculpts (as you would expect from the PERRYs) and easy to assemble.
Enjoy!


As usual. comments are welcomed.
Cheers

READY FOR INSPECTION: Eureka 28mm Polish

$
0
0
ABOVE: Polish Infantry Officers, Eagle Bearer and Eagle Guards.
 Hi Guys
I visited EUREKA MINIATURES yesterday after work and purchased some of the recently cast POLISH INFANTRY and ARTILLERY (1809-14).
These are 28mm miniatures and are a recent addition to EUREKA's expanding Napoleonic range. EUREKA has a very good French Revolution range, but with the these Poles (together with their very nice Saxon Heavy Cavalry -1812) EUREKA seems to be moving into the 'Napoleonic Proper' period of 1805 -1815.
I must say I'm not sure if these Polish will be in the 'EUREKA MINIATURES' stable, or simply cast and sold by Nic at EUREKA. I believe they are sculpted by Paul Hicks.
I guess all that 'industry stuff is of interest to some, but I must admit I don't really care who owns the range at the end of they day, I just want to know where I can get them from, and it appears EUREKA has the selling rights.
Lets look at the infantry first.
They a produced in FULL DRESS and CAMPAIGN uniforms. I purchased my Poles in Campaign dress.
As expected you have available the elite company troops (Grenadiers and Voltigeurs) and the Line or Center company Fusiliers. The command types consist of Officers, Drummers, Eagle Escorts / Guards and Eagle Bearers.
BELOW:Pioneer and two Drummers
 The detail and sculpting is very good. As for compatibility with other manufacturers I can report they will mix very well with Perry Miniatures.
There is anything from 3 to 6 variants for the infantry, and at least two different Drummers.
There are two different variants of Eagle Guards. I'm unsure how many different types of officers there are. I think you only get one option for a pioneer, (though you should only need one anyway).
 ABOVE and BELOW:The Colour Party. Eagle Guards and Bearer.
 You also have 'Skirmishing' variants to chose from.
The posing is first rate, and there are no silly poses to be found here.
 As you can see below, these miniatures have plenty of character. Most have on their heads the traditional 'Czapka' Shako, but some are bareheaded, and some wear 'Bonnets'. Grenadiers in Bearskin caps are available for those who like their Grenadiers in fur hats.
ABOVE: Fusiliers 
BELOW: Voltigeurs 
 BELOW: Grenadiers
 Now for the Artillery.
As for the actual cannon you get a choice of Austrian 6 Pdrs (captured and handed over to the fledgling Polish Grand Duchy, or French 8 Pdrs.
As with all of EUREKA MINIATURES artillery, you get all the bibs'n'bobs. Rammers, Buckets, stacked muskets and ammo boxes to name just a few.
The detail is very good and very little clean up was required. I purchased the Austrian guns, (mainly because I'd only purchased French cannon in the past).
 The Gunners a available in either 'Loading' or 'Firing' poses. As with the infantry, the gunners have heaps of character. Poses are excellent as is the accuracy of their uniforms and the detail and quality of the sculpts themselves.
 All in all these are excellent miniatures in my humble opinion and I highly recommend them to you.
BELOW:The Gunners: Loading and below them, Firing.

 BELOW:A mounted officer
My only criticism is there are no 'Casualty' variants (as yet), and the poles for the Eagle Guard Halberds and flag pole are rather thin but I'm being very picky.

UPDATE:
My mate'Gunner Dunbar' has also done a review of these miniatures (well, the Infantry at least) some time ago. You can read his comments here LINK
You can see painted examples here: LINK and here: LINK
It has come to my attention that the Poles were originally a commission job by Roger Murrow and they are also available from him as'MURROWSKI MINIATURES'. There are Krakus Cossaks, ADCs and Generals available. Good Times good times!

Oh, and if you're in the market for a Giraffe riding a unicycle EUREKA MINIATURES can help you with that.

Cheers for now.
Comments welcomed.

Billiardsburg: A MAURICE AAR

$
0
0
ABOVE:The Objective. The Saxon band played so badly that the 'Old Fritz' ordered that every member of the band be shot and their instruments destroyed!
Hi All
It's been a while since I posted an After Action Report (AAR), so I traveled 70 mins south today to Melbourne and joined the excellent LEAGUE OF ANCIENTS wargame club.
I made arrangements to have a game of MAURICE with Victorian wargaming stalwart Michael B. I decided to trot out my 28mm Prussians for their first every battle. Michael always has beautiful armies, and he didn't disappoint and brought out his magnificent EUREKA MINIATURES Saxons. My Army is predominately FRONT RANK, but there is a smattering of EUREKA MINIATURES cavalry and PERRY infantry.

My army Order Of Battle (ORBAT) was as follows:
3 x ELITE INFANTRY
3 x TRAINED INFANTRY
3 x TRAINED CAVALRY
2 x ARTILLERY GUNS
1 x IRREGULAR INFANTRY

As I was the attacker, I selected an additional unit of TRAINED INFANTRY.

National Advantages:
LETHAL VOLLEYS
STEADY LADS
CLERICS
BELOW: My Massed Prussian Cavalry. Hussars and Dragoons.

Michael's Saxon Army's ORBAT was:
1 x ELITE INFANTRY
7 x TRAINED INFANTRY
4 x TRAINED CAVALRY
4 x ARTILLERY GUNS
4 x TRAINED CAVALRY.
National Advantages:
La Bayonet
Cavaliers.

BELOW:Saxon Cannon and Musketeers on the hill.
Now on to the AAR:

King Fredrick sat bolt upright in his bed.
Mien Gott!!! Vat is zat infernal racket? Vill ve get no peace”?

“Majesty, it appears ze Saxons have deployed a new vepon. Zey intend to drive us all mad vit zee constant vailing of zee band on zee hill. Ve vill get no rest tonight”.

The Old Fritz looked towards the west at the high ground outside the town of Billiardsburg where his army was garrisoned for the night.

“Tomorrow I vill be shoving drums and horns vere der sun vont shine”

Opposing Plans:
Michael plan seemed to to me to be one that consisted on simply sitting on the objective, (a Large hill where the offending Band merrily played something resembling the screams of a cat and dog both being castrated simultaneously by a near blind butcher with a blunt butter knife).
Just to deter me he massed his guns (all four of them) and a Regiment of Infantry on the hill. He split his cavalry across the left and right flanks. Three regiments were positing on his left flank, and one was placed on his right. The bulk of his infantry, including his sole ‘Elite’ Grenadiers were deployed in two lines to his right of the objective. On his left of the hill was another regiment of musketeers and the three Regiments of Horse.

I deployed as follows from my left to right:
The sole Irregular infantry, the Hessian Jagers were positioned with the large wood directly to their front. Next I massed five regiments of foot in two lines of three regiments up front and two in support. In the lead I had my three ‘Elite’ Regiments, (Grenadiers and Fusiliers) with two trained regiments (Musketeers) in support. Next in line and to the right of the town were another two regiments of Musketeers and then all my Horse Regiments, consisting of two Hussar Regiments and one Dragoon Regiment. Finally I deployed my two guns.
My plan was to advance with my five infantry regiments supported by the Jagers and attempt to blow a hole in the Saxon line by superior firepower. I was relying on a combination of superior ‘Espirit de Corps’ (my elites V his trained) and ‘Lethal Volleys’ to win the day for me. 

BELOW: The deployment. As you can see I've kept my Cavalry and Infantry on my right flank back out of Artillery range.

 The Action!
The battle opened with an advance by my Irregulars, the Jagers moving off towards the woods and the main infantry force stepping of towards the waiting Saxons.
Michael for his part commenced a massed bombardments and an advance of his massed horse Regiments on his left. Clearly he planed to distract me from the real business at hand which for me meant getting my main infantry force to volley range as soon as possible.
His plan worked.
I countered by advancing the two infantry regiments of musketeers to my right to confront the leading two regiments of Saxon Horse.
Michael's gunners now had these two unfortunate regiments in range, and soon roundshot was smashing into one of the regiments, killing one of the much beloved colonels Prinz Augusta Von Manstien, (read: Michael played the ‘Death Of A Hero’ card). My army moral dropped by two points.
BELOW:I move my two right flank Infantry Regiments (Musketeers) forward to respond to the threat of Saxon Horse. In the distance my Main Force wait's outside musket range. The Saxon horse would soon need buckets to catch all the lead.
 BELOW:My Main Force Infantry pause whilst issues are decided on their right flank.
Fortunately for me however I was able to rally off most of the disruption the infantry had sustained due to the enemy artillery fire. At that point someone within the Saxon Cavalry had a rush of blood (read:I played the ‘Heat Of Battle’ card) and one of his regiments of Horse charged into my steady infantry. Within two or three rounds of battle the threat to my right had be nullified, with two of Michael's cavalry regiments teetering on being destroyed. I considered now that the situation on my right was in hand, and decided to turn my attention back to the main effort.
Michael had distracted me for long enough.
I now set about launching my main force infantry onto the offensive again and advanced to volley range. After about three or four rounds of musketry I threw forward my infantry with the bayonet.
Soon two out of the three regiments in Micheal’s first line were routed, with only his ‘Elite’ Grenadiers still holding their ground.

 ABOVE:The fire fight erupts between the two main Infantry forces whilst the cavalry attack on my right peters out,...
BELOW: Saxon Cuirassiers consider their fate.
It was at this point Michael ordered his army to retire.
With my Grenadiers and Fusiliers battered but still full of fight I halted as the Saxon army withdrew.
Later that night the Prussians stacked what Saxon drums, horns and euphoniums they could find and burnt them. Tonight they would sleep soundly.
BELOW:Where there were six Saxon infantry Regiments there are now only four.
 BELOW:The situation as Michael orders a withdrawal. 
SUMMARY.
Another fun game of MAURICE.
Game length was a very manageable 2 hours.
Michael and I discussed the value of ‘Lethal Volleys’ (LV) and we agreed that at 12 points it was a bit to inexpensive. We thought 18 points might have been closer to its true value.
That said, after reading the discussion on the HONOUR FORUM(see topic: Lethal Volleys too lethal?) and pondering the result of the game I’m now not so sure. Without LV, I doubt I’d have stood much chance of a win at all. I either have to take the objective, or rout the enemy. Given I’d have to clobber my way up a hill through 4 artillery and then a Regiment of infantry I suspect I’d go down in a heap. Trying to win in a straight up firefight without LV against Michael’s Saxon line while relying purely on my better moral would have been quite risky I think. LV at 12 points basically sees me giving up 2 regiments or either Horse or Infantry, which to my way of thinking is about right. Also, LVis only useful if you actually HIT the enemy. There were a couple of rounds there where my volleys (shooting) were pathetic. Fortunately for me Michael’s was just as bad.
So I guess the great LVdebate will continue. Maybe a compromise worth considering is LV can only be used with ‘ELITE’ infantry. It’s something to think about.
For what it’s worth, my ‘Clerics’ card (costing 9 point) was a waste, as I only used it twice. Given I use 99 of my 100 points, if I had ditched ‘Clerics’ I could have grabbed another Regiment of ‘Trained’ infantry and one Regiment of ‘Conscripts’.
ABOVE:The Prussian Musketeers that performed so well in the face of the Saxon Horse. BELOW:Prussian Fusiliers cast a weary eye over the Saxon Grenadiers
 BELOW:The very well dress Saxon 'Ranchow' Regiment in the Saxon 2nd Line.
 As usual, comments are welcomed.
Oh, and a plug here for MAVERICK MODELS FLAGS. My Prussians are carrying the material flags available from MAVERICK MODELS. As usual, excellent service from Stuart.
I really like these flags. I particularly like the way they can be easily folded and twisted to look like they are flapping about in the breeze.
Highly recommended.
Cheers

PERRY MINIATURES: French Young Guard Tiraileurs

$
0
0
 Hi Guys
I've finally finished basing my PERRY MINIATURES  French Young Guard Tiraileurs. I really like these miniatures. I've always been fascinated by this Corps of Napoleon's Imperial Guard. They are sort of like a Napoleonic version of the German 12th SS Panzer Division 'Hitlerjugend'. 
Anyway, the PERRY's have done an excellent job on modelling these lads. I really like the way that they seem to be leaning into the withering fire of the enemy (probably Prussians). They really appear to be determined to get stuck in.
I've based them on 50mm wide by 40mm deep bases.
The flag is an excellent GBM Flag. A real piece of fine art IMHO.

I hope to soon have them in action against my Prussians.
I'll get around to a solo game of LASALLE or FoG-N soon I hope. Something 1815 probably.


As usual, comments are welcomed.
Cheers

PERRY HESSIANS

$
0
0
ABOVE: Musketeers from Regt von Rall.
Hi Guys
I've finished another 4 units for my 'MAURICE' AWI Project.
They are four Battalions of Hessians  Two are from Regiment (Regt) Von Rall and two are from Regt von Knyphausen.
The miniatures are the incomparable PERRY MINIATURES 28mm from their AWI Range.
Flags are from FLAGS OF WAR
I've based them on 40mm wide by 50mm deep bases with 4 bases to a unit.
BELOW: Grenadiers and Fusiliers from Regt von Knyphausen.

 BELOW: The 'Hatmen' or Musketeers from Regt von Knyphausen
 BELOW: All four Battalions ready for action.
 I will also use these guys for games using the excellent 'BRITISH GRENADIER' rules.
I've still got several battalions of PERRY METAL British to paint and recently ordered 3 boxes of the PLASTIC British Infantry and several packs of Americans, both Militia and Continentals.
I will certainly have my work cut out for me to get them all painted and based.
Feel free to leave any comments.
Here are some more photos for your viewing pleasure below.


Viewing all 81 articles
Browse latest View live


Latest Images